Program Diversity and Persistence Quick Start
Step 1. Setup the Virtual Machine
Prerequisites
To be able to successfully follow this Quick Start, you will need an Amazon Web Services Console Web Account with sufficient permissions to instantiate EC2 instances.
Ed-Fi can help with hosting a virtual machine on Amazon Web Services. Please enter a ticket into Ed-Fi's tracker to request help hosting your quick start virtual machine. You can create a new ticket by clicking on the "Create" button on the top menu of tracker.
Set up the Virtual Machine in AWS
Follow these steps to create an instance of the VM that contains the Ed-Fi ODS / API and the Program Diversity and Persistence Starter Kit Dashboards.
- Sign in to your AWS Console Web Account
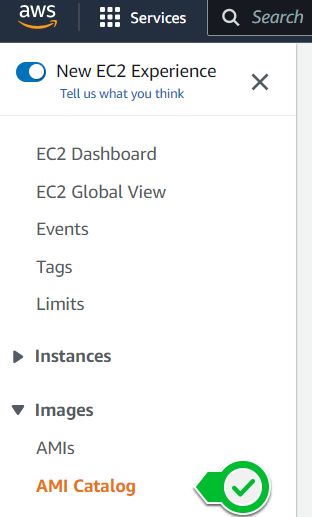
- On the top menu select Services and then EC2

- On the left navigation menu select IMAGES then AMIs
- On the top right-hand side, ensure that the "Ohio" availability zone is selected.
- Click on AMI Catalog
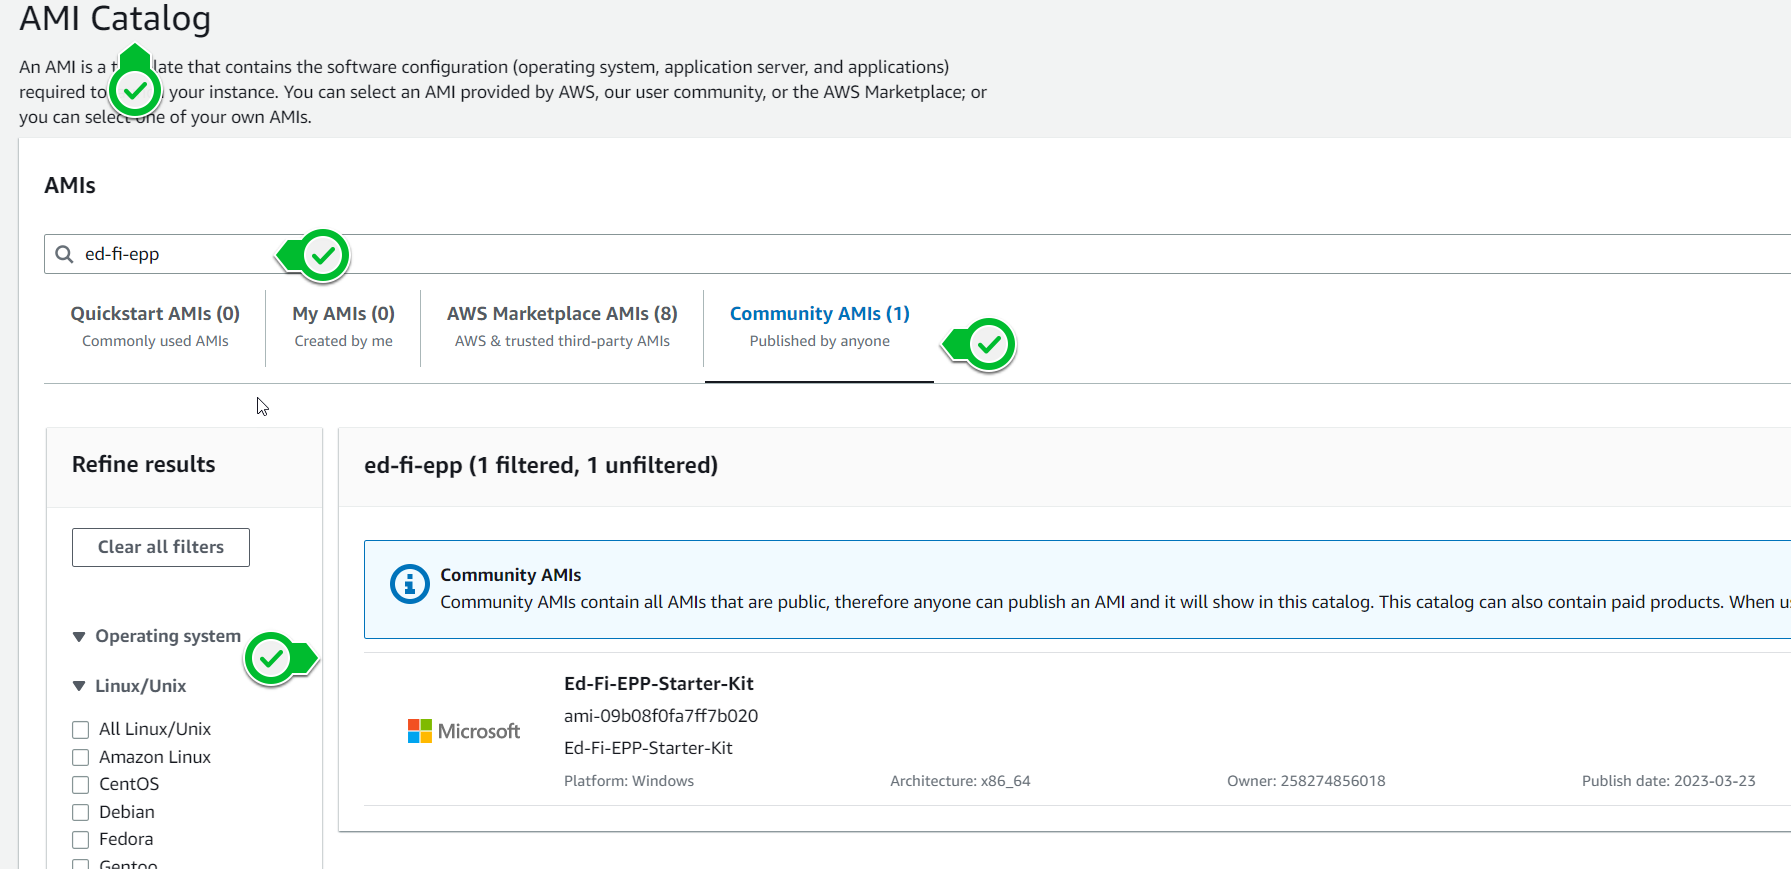
- Add the search terms: ed-fi-epp to the search box and hit enter to initiate a search.
- Click on the Community AMI's tab
- You should see an image show up, titled "Ed-Fi-EPP-Starter-Kit":
- Click the orange 'Select' button on the right side of the image
- Click 'Launch instance with AMI' near the upper right corner
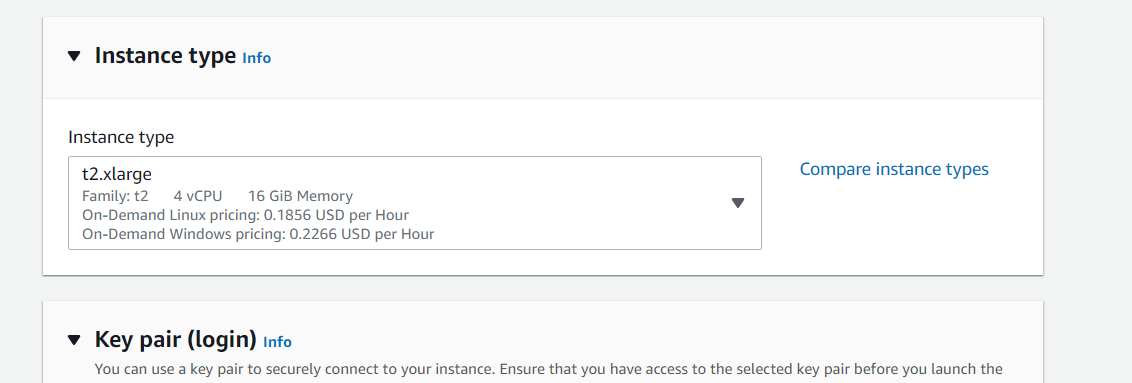
- On the "Launch an instance" screen scroll down to the "Instance Type" section and choose a type
Note: We recommend you use at least a t2.large. We have tested with smaller instances but they seem to be too slow to work with. Ideally a t2.xlarge provides a great responsive Windows UI and Ed-Fi development environment.
- In the section below the instance type is asking for a key pair name. This is usually used to retrieve the instance’s Administrator Password. (This is not required as our image has a default password defined later in this document) You can select one from the list or create a new one. Once you've made your choice for a key pair, lick the orange “Launch Instance” button in the lower right corner
- You are now presented with a “Launch Status” screen. On the bottom right corner you will see another blue button that says "View Instances". Click it.
- You will be redirected to the EC2 homepage where you will see your new instance starting up. You can edit the name for easy identification.

- Once the status changes to “Running” you can copy the IP address and use it to remote desktop into the server.
- Connecting to your EC2 instance:
- If you're on a Windows machine, go to your Start Menu
 and search “RDP”. Click on the "Remote Desktop Connection" application as depicted below.
 - If you're on a Mac, download Microsoft Remote Desktop from Apple's Mac Store.
- If you're on a Windows machine, go to your Start Menu

- Once the application opens, use the public IP that was given to your VM instance and the following credentials:
- Username: Administrator
- Password: EdFi!sCool
 This will log you in to the virtual machine where you can start exploring the Program Diversity and Persistence Starter Kit.
Step 2. Explore the Starter Kit
Once you have logged in to the Virtual Machine click on the "Start Here" shortcut that is on the computer's desktop.
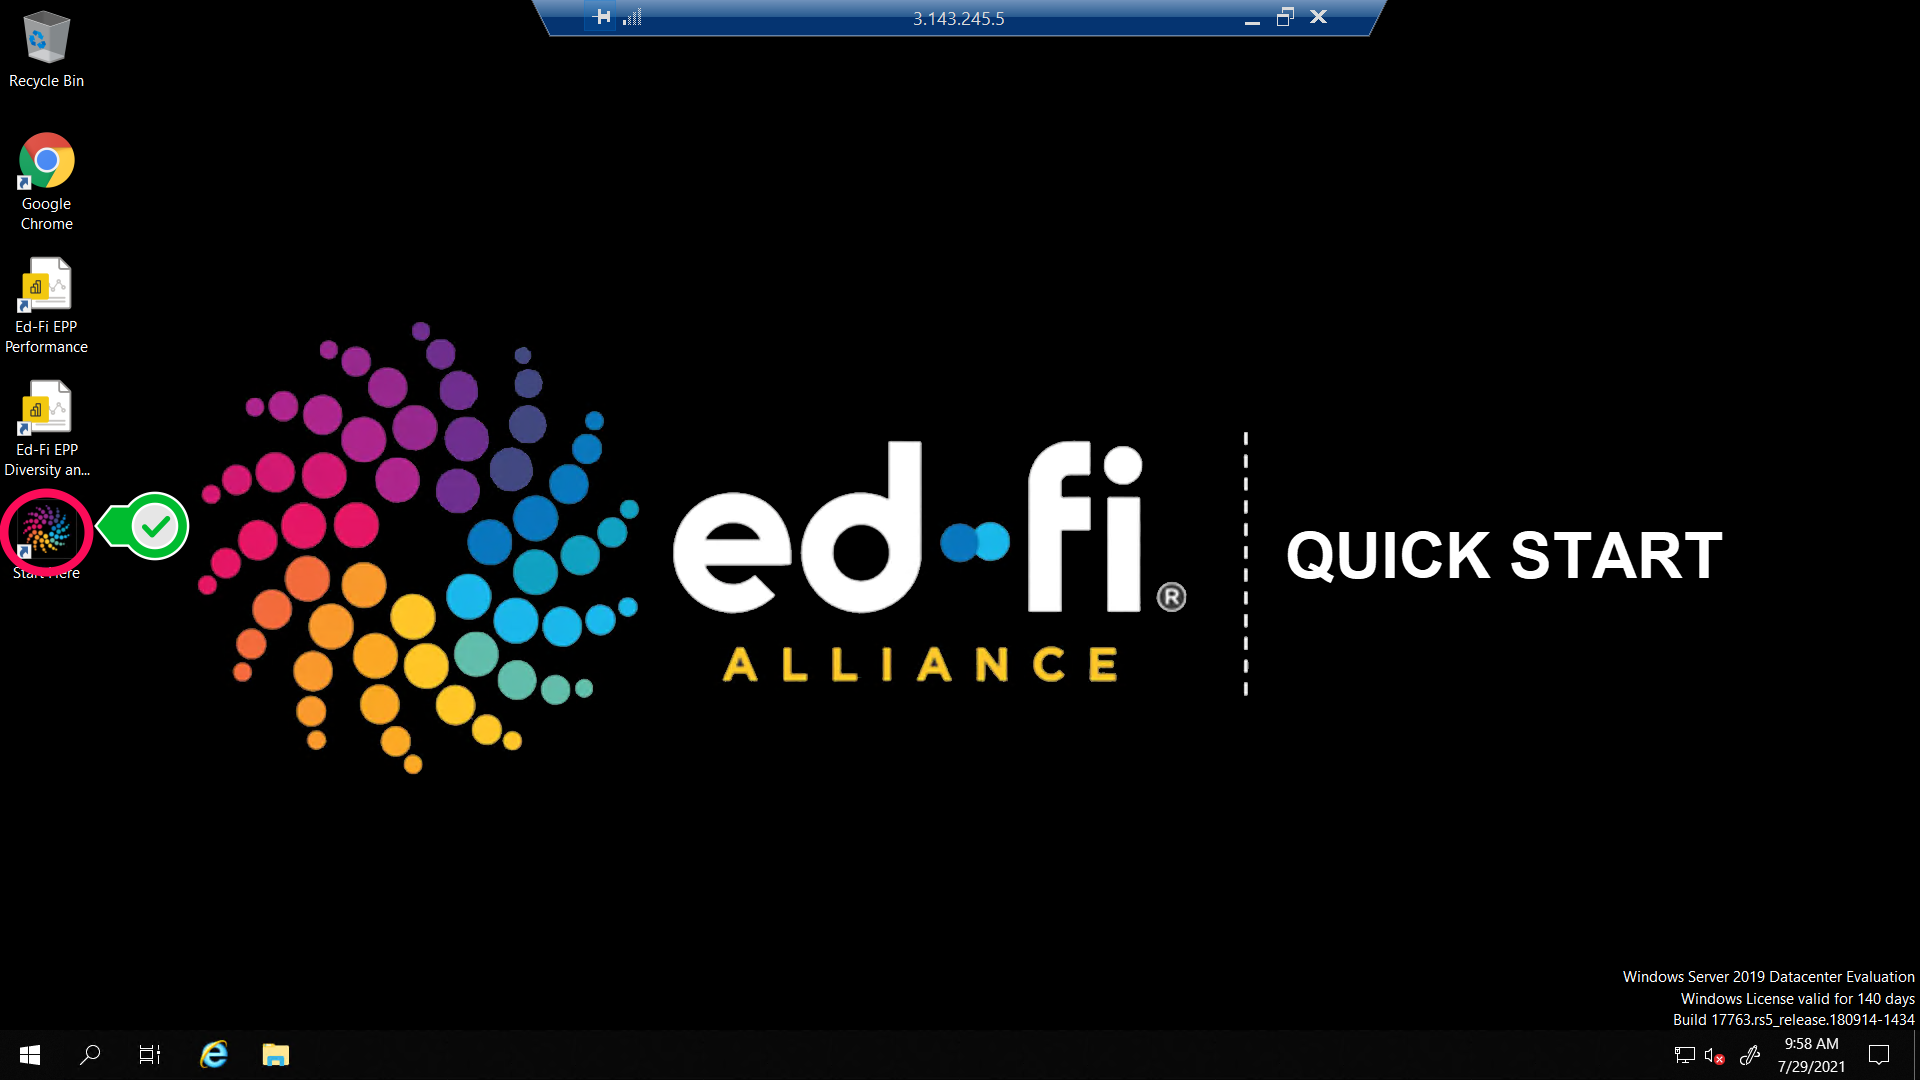
This will open a web page that will guide you through the rest of the process. In a nutshell, it will show you how to open the Power BI dashboard and work with it.
.png?version=1&modificationDate=1678116556137&cacheVersion=1&api=v2)
Follow the use cases and guide described in: Program Diversity and Persistence Dashboard Walkthrough.