A newer version of the Ed-Fi ODS / API is now available. See the Ed-Fi Technology Version Index for a link to the latest version.
Year-Specific Installation Steps
This section describes how to set up the Ed-Fi ODS / API v5.3 in sandbox mode. Before you proceed, make sure you have installed the prerequisites listed in Getting Started - Binary Installation.
Out of the box, the Ed-Fi ODS / API installs TPDM core extension plugin. If you are interested in TPDM community edition, refer to Installing Ed-Fi ODS / API 5.3 with TPDM-Community v1.1
Step 1. Download the Ed-Fi ODS / API Installer Packages
The Ed-Fi ODS / API installation packages can be downloaded from the following links:
Package Links
The required release packages to install the Ed-Fi ODS / API can be found at the links below. We recommend you stay current with the latest patch update that has been promoted to release.
- EdFi.Suite3.Installer.WebApi
- EdFi.Suite3.Installer.SwaggerUI (Optional, not for production)
- EdFi.Suite3.RestApi.Databases
- Your extension plugin package (Optional)
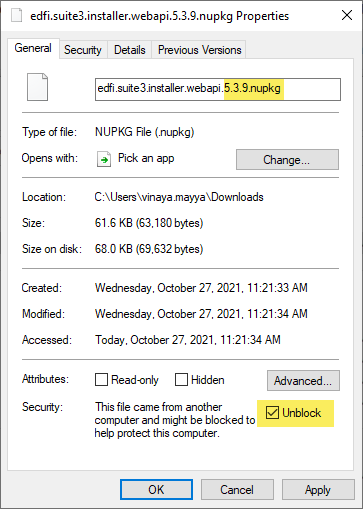
For each of the downloads, right-click and select "Properties." Update the file extension (from .nupkg to .zip). Remove the version number (optional). Check the box next to Unblock (this will prevent Powershell from asking for permission to load every module in the installer) and click OK.
You may need to configure TLS while running the installation scripts described in steps below.[Net.ServicePointManager]::SecurityProtocol += [Net.SecurityProtocolType]::Tls12
Step 2. Install the Ed-Fi Databases
Extract the contents of the EdFi.Suite3.RestApi.Databases package. The paths in these instructions assume that the package was extracted to a folder with the name of the package (e.g., C:\temp\EdFi.Suite3.RestApi.Databases).
Edit the configuration.json File
There are several settings in the configuration file that are left empty as they depend on whether you are opting of SQL Server or PostgreSQL backend. Update the settings by consulting the samples provided below.
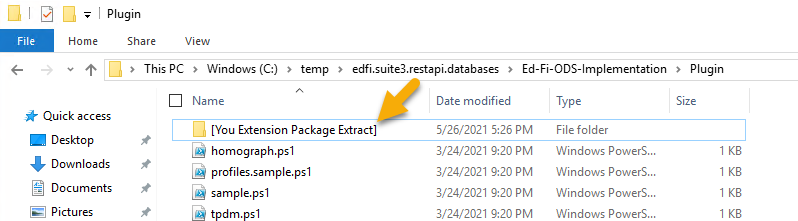
Copy your extension plugin to database deployment package
If you have an extension plugin package that you would like to be the deployed to Ed-Fi Databases, place the extracted contents of your extension plugin package in the extracted EdFi.Suite3.RestApi.Databases package under Ed-Fi-ODS-Implementation\Plugin folder.
Enable your extension plugin in the deployment configuration
Edit the Plugin section of the configuration file and update the Folder and Scripts values to the following:
"Plugin": {
    "Folder": "../../Plugin",
    "Scripts": [
    ]
  }
Run Installation Script
Open a PowerShell window in Administrator mode and navigate to the EdFi.Suite3.RestApi.Databases package folder.
Run the following PowerShell command to load modules for installation:
Import-Module .\Deployment.psm1
Next, execute the following command in PowerShell:
Initialize-DeploymentEnvironment
Step 3. Install WebApi
Extract the contents of the EdFi.Suite3.Installer.WebApi package. The paths in these instructions assume that the package was extracted to a folder with the name of the package (e.g., C:\temp\EdFi.Suite3.Installer.WebApi).
Prepare Installation script
Open a PowerShell window in Administrator mode and navigate to the EdFi.Suite3.Installer.WebApi package folder. Run the following Powershell command to load modules for installation:
Import-Module .\Install-EdFiOdsWebApi.psm1
The WebApi installer can take a number of parameters to tailor the installation experience (more examples can be found in the Install-EdFiOdsWebApi.psm1 file). At a minimum, database connection info is required.
Copy and modify the following parameter code to fit your connection information:
Paste the modified parameter code into your PowerShell window and hit Enter.
Run the Installation Script
Run the following command in the PowerShell window:
Install-EdFiOdsWebApi @parameters
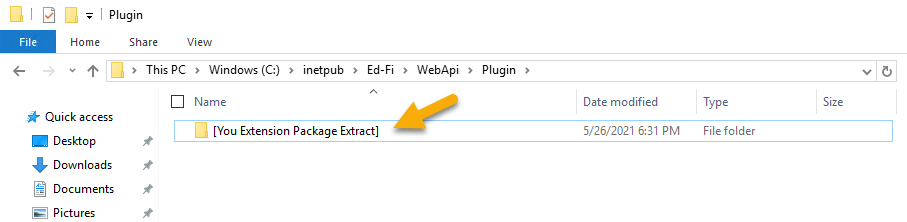
Copy your extension plugin to deployed WebAPI
If you have an extension plugin package that you would like to be the deployed to Ed-Fi WebApi, place the extracted contents of your extension plugin package in C:\inetpub\Ed-Fi\WebApi\Plugin folder.
Enable your extension plugin in appsettings.json
Open the appsettings.json file found in C:\inetpub\Ed-Fi\WebApi.
Edit the Plugin section of the configuration file and update the Folder and Scripts values to the following:
"Plugin": {
    "Folder": "./Plugin",
    "Scripts": [
    ]
  }
Step 4. Install Swagger
Extract the contents of the "EdFi.Suite3.Installer.SwaggerUI" package. The paths in these instructions assume that the package was extracted to a folder with the name of the package (e.g., C:\temp\EdFi.Suite3.Installer.SwaggerUI).
Prepare Installation Script
Open a PowerShell window in Administrator mode and navigate to the "EdFi.Suite3.Installer.SwaggerUI" folder. Run the following Powershell command to load modules for installation:
Import-Module .\Install-EdFiOdsSwaggerUI.psm1
The Swagger UI installer can take a number of parameters to tailor the install experience (more examples can be found in the Install-EdFiOdsWebApi.psm1 file). At a minimum, WebAPI connection information is required.
Copy and modify the following parameter code to add your site name:
$parameters = @{
    PackageVersion = "5.3.1499"
    WebApiVersionUrl = "https://YOUR_SITE_OR_SERVER_NAME_HERE/WebApi"
}
Paste the modified parameter into your PowerShell window and execute the code.
Run the Installation Script
Run the following command in the PowerShell window:
Install-EdFiOdsSwaggerUI @parameters
Step 5. Install Admin App
The Admin App provides a graphical interface for platform hosts to administer and manage non-sandbox instances of the Ed-Fi ODS / API. Follow the installation steps here to install Admin App for administration of Ed-Fi ODS / API in YearSpecific mode and then configure your year specific instances as described in here. Alternatively, API keys and secrets can be administered by database administrators via SQL queries as outlined in the article How To: Configure Key / Secret.
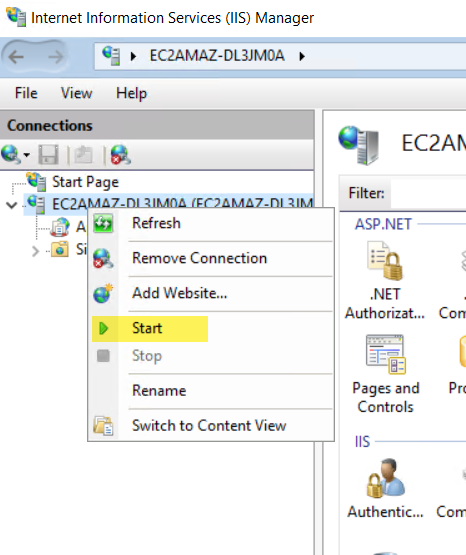
Step 6. Restart your Website
Just a few more tasks to complete your installation:
- Open IIS (Press the Windows key
on your keyboard, type IIS, select Internet Information Services (IIS), and press Enter.
- Right-click on the server (alternatively, you can right-click the EdFi web site), and select Stop.
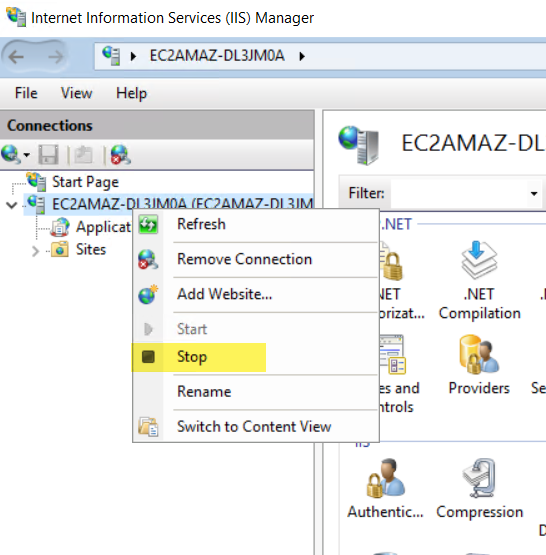
- Right-click the server (or EdFi website) again and select Start.
You are now ready to use the Ed-Fi ODS / API. The following URLs are available:
| Website | URL |
|---|---|
| Ed-Fi ODS / API | https://YOUR_SERVER_NAME_HERE/WebApi/ |
| Ed-Fi Admin App | https://YOUR_SERVER_NAME_HERE/AdminApp/ |
Ed-Fi ODS / API Documentation (Optional, not for production) | https://YOUR_SERVER_NAME_HERE/SwaggerUI |
Contents
Find out more about how to begin using the Ed-Fi ODS / API: