MetaEd IDE - Creating and Maintaining Your Extension
The MetaEd IDE makes it easy for implementers to create their own Ed-Fi Extensions. The basic steps to do that are fairly simple, and so are a great place to get started with the IDE. The steps can be summarized as follows:
Detail on each step follows.
Step 1. Configure MetaEd Preferences
- Open Visual Studio Code
- If you haven't already installed the MetaEd extension, please do so now.
- Open the settings, either with the
Control+,shortcut or from the menus:File > Preferences > Settings. Switch to the Workspace settings tab
There are some MetaEd settings visible under the User tab. Please ignore these and only use the Workspace tab.
- Expand
Extensions > MetaEdor type "metaed" in the search bar to scroll to the available settings. - Available settings:
- Accepted License: Usage of the MetaEd IDE requires acceptance of the Ed-Fi License agreement. Check the box to accept the license terms.
- Target Ods Api Version: The target Ed-Fi ODS/API version.
For ODS/API version 6.2, select "6.1.0" as the target version. From MetaEd's perspective, there is no difference between the two.
- Ods Api Deployment Directory: Full path to root folder for the Ed-Fi ODS / API source code. The folder this points to should contain Ed-Fi-ODS and Ed-Fi-ODS-Implementation folders.
- Suppress Delete on Deploy: Stop deployment from deleting the SupportingArtifacts API folder. For advanced users only.
- Alliance Mode: For Alliance users only, this makes core files editable. Non-Alliance users must leave this setting disabled to avoid dangerous and costly mistakes.
 Alliance mode users: manually update the "Data Standard Project Directory" to the correct folder path to the active Ed-Fi-Model repository.
Step 2. Add an Extension Project
Step 2a. Create a New Extension Project
In a future release we hope to restore some of the "new project/file" templates that were present in older (< 4.0) versions of the MetaEd IDE.
METAED-1348 - Getting issue details... STATUS
In your operating system, create a new directory to store your MetaEd files, initialize it with the common set of directories, and create a package.json file. There is a sample script below to help automate this.
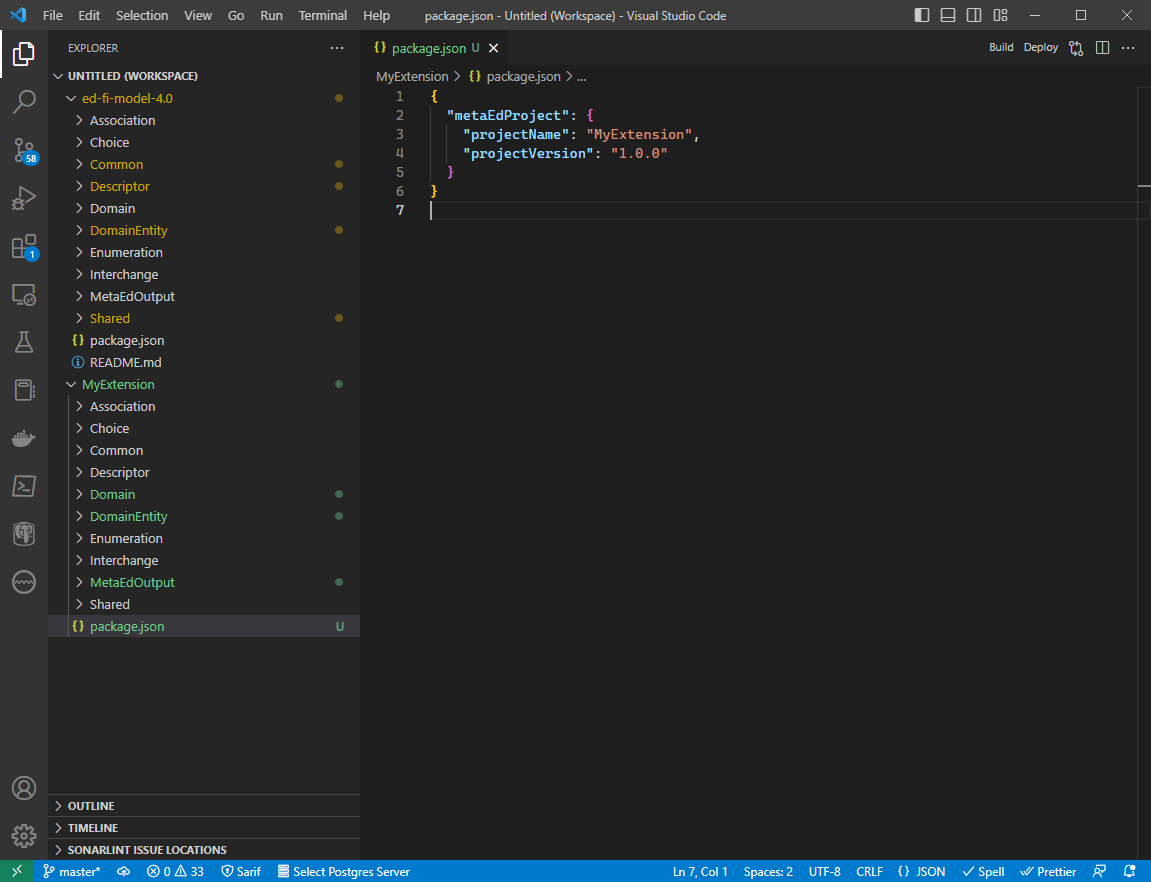
Sample package.json{ "metaEdProject": { "projectName": "Sample", "projectVersion": "1.0.0" } }The projectName
- must start with an uppercase alphabetic character
- must have at least two alphabetic characters
- should avoid special characters, as they will likely be stripped out for downstream artifacts
For example, "Project-Two" will be transformed to a "projecttwo" database schema by the SQL plugin.
The projectVersion should follow SemVer 2.0.0 principles. In short: modify the first digit when you have a breaking change to your API model; modify the second where there are backward-compatible enhancements; and modify the third when there is a bug fix / patch.
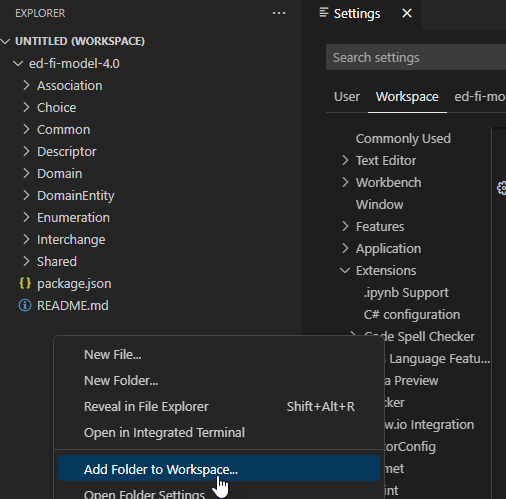
- After select your target version in the settings above, right-click in the Visual Studio Code Explorer pane and select "Add Folder to Workspace...".
- Navigate to and then select the new folder you created above. In Visual Studio Code you should now see your extension folder loaded beneath the ed-fi-model folder (shown collapsed in this view), and you should be able to open and edit the package.json file (for example, if you want to change the version number).
Step 2b. Alternate: Modify One or More Existing Extensions
As per step 2 above, existing extension folders may be added to the workspace. Simply add one or more folders with the "Add Folder to Workspace..." command.
Step 2c. Add the Correct Data Model Project
The Ed-Fi Data Standard has multiple versions and your extensions need to be targeted at the Data Standard and ODS / API versions you are using. Please consult the ODS / API documentation for information on the version(s) applicable to your project. This information is generally found in the "What's New" section of the documentation. Alternately, see Ed-Fi Technical Suite Version Matrix for all available versions.
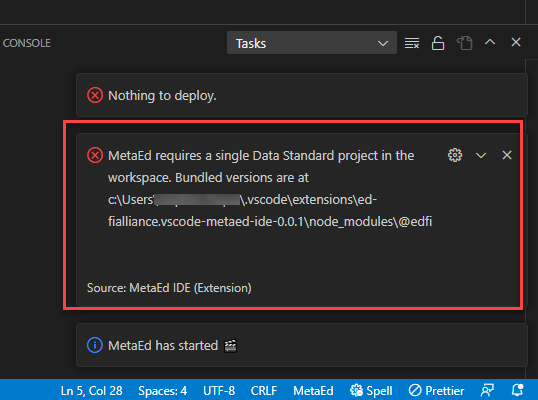
Once you know which data model version to use, you need to add it to the workspace by right-clicking in the Explorer and choosing "Add Folder to Workspace...". However, the folder containing all of the data model files is difficult to find. The simplest way to determine where to find the files is to click the Build button after you have opened your extension: this will present you with an error message that helpfully tells you where to find the data model files. Copy that location and paste it in when adding a folder to the workspace.
Step 3. Add MetaEd Files to the Project Folder
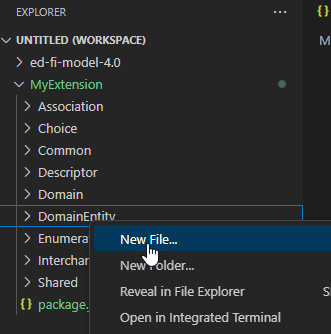
- Right-click on any of the folders to add a new file.
When you save the file, be sure to save with
metaedas the file extension. For example, if you have a new Domainentity calledClassDiscussionthen you would create the file under theDomainEntityfolder and name itClassDiscussion.metaed.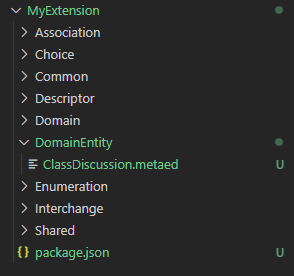 As a best practice, the name of the file should match the name of the resource being created. MetaEd files should always be saved with a .metaed extension.
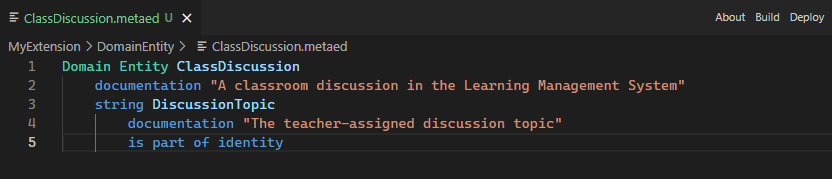
- Now open your new file and begin adding detail to it, using the MetaEd Language Specification.
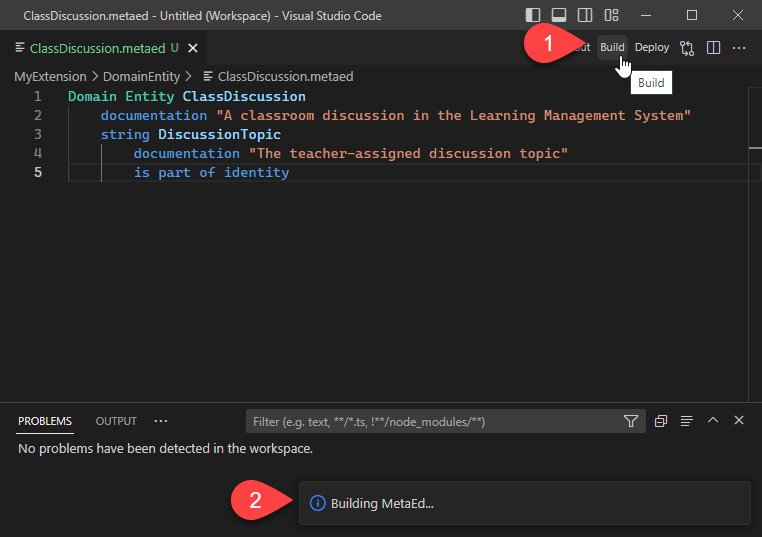
Step 4. Build the Project
When you are ready to test that your project will build properly, click the Build button in the upper right corner of the editor. After clicking this, you will see a notification "Building MetaEd..." in the bottom right corner.
Please see MetaEd IDE - Common Problems and Troubleshooting if you run into an error and are unsure of how to correct it.
Artifacts build successfully.
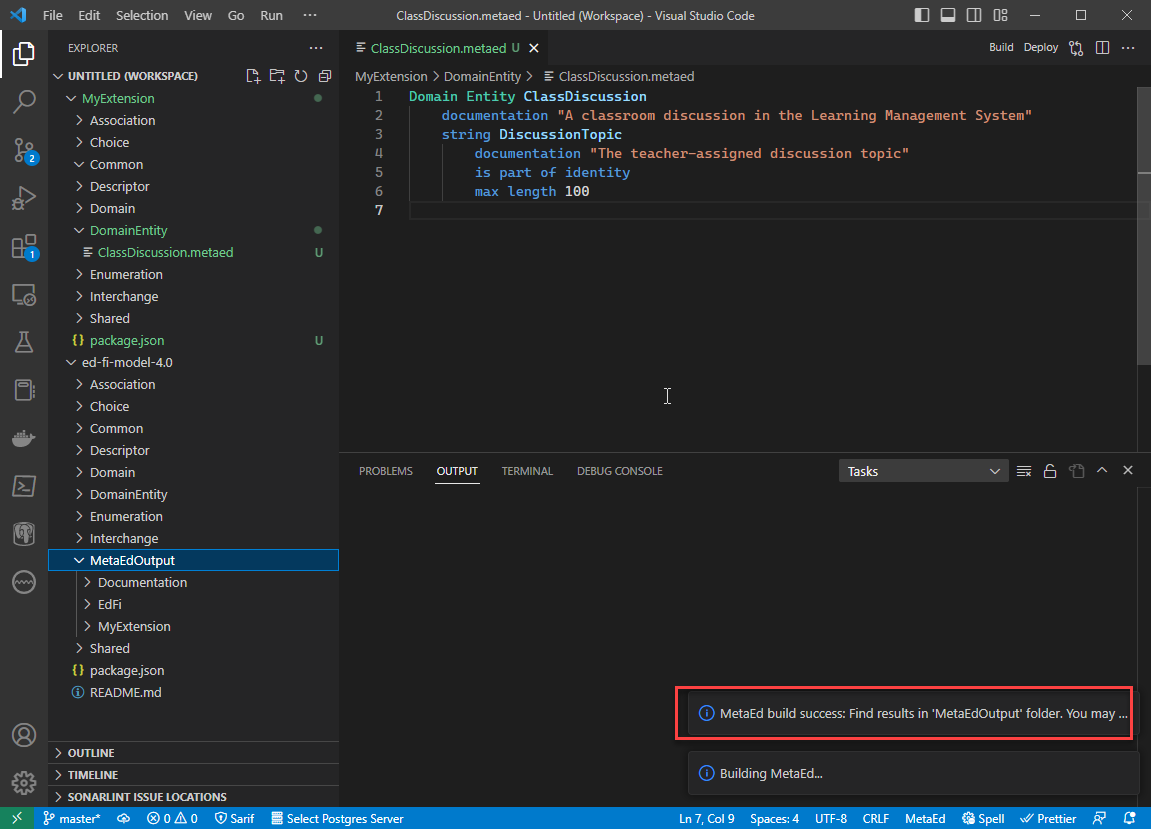
Step 5. View MetaEd Output
Expand the project in the tree view and click MetaEdOutput to explore generated artifacts. The MetaEdOutput folder is created in the last workspace folder at the time that the project was built. However, the folder will contain generated artifacts for all of the MetaEd projects in the workspace.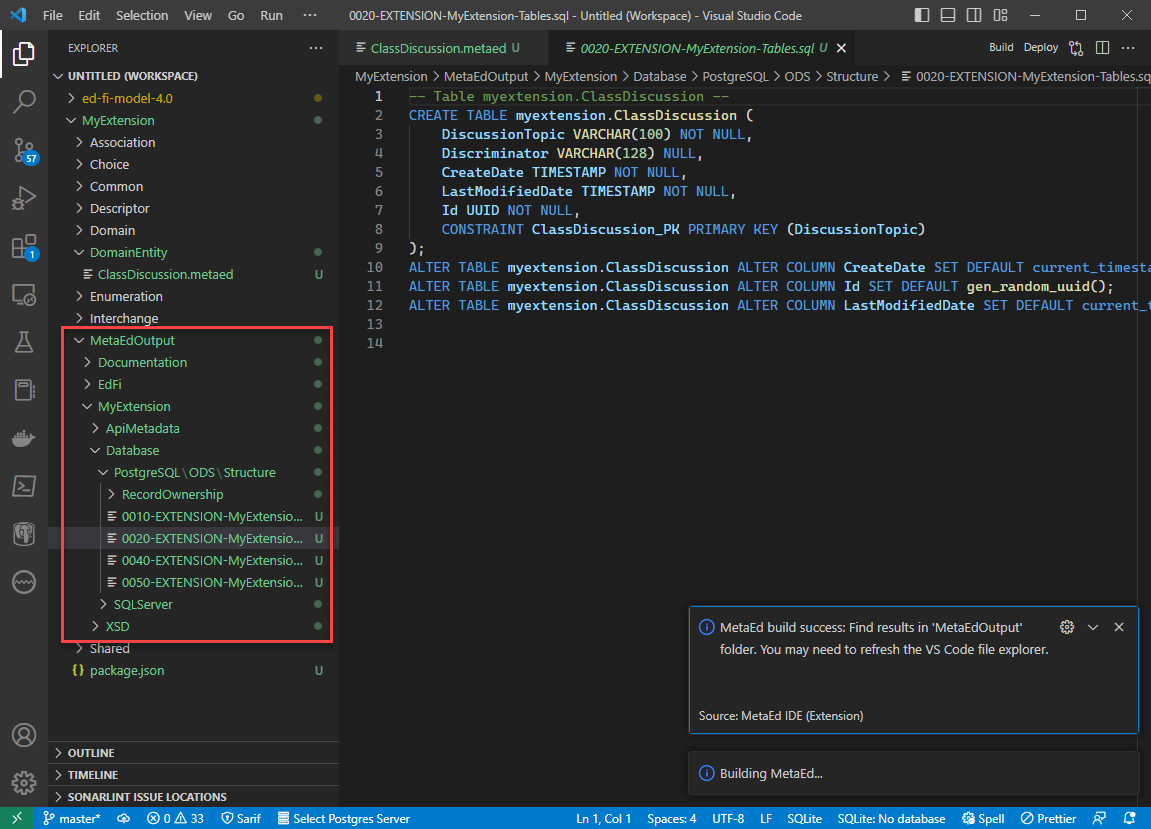
Step 6. Save Workspace File (optional)
Click on File > Save Workspace As to create a workspace file in your extension folder.
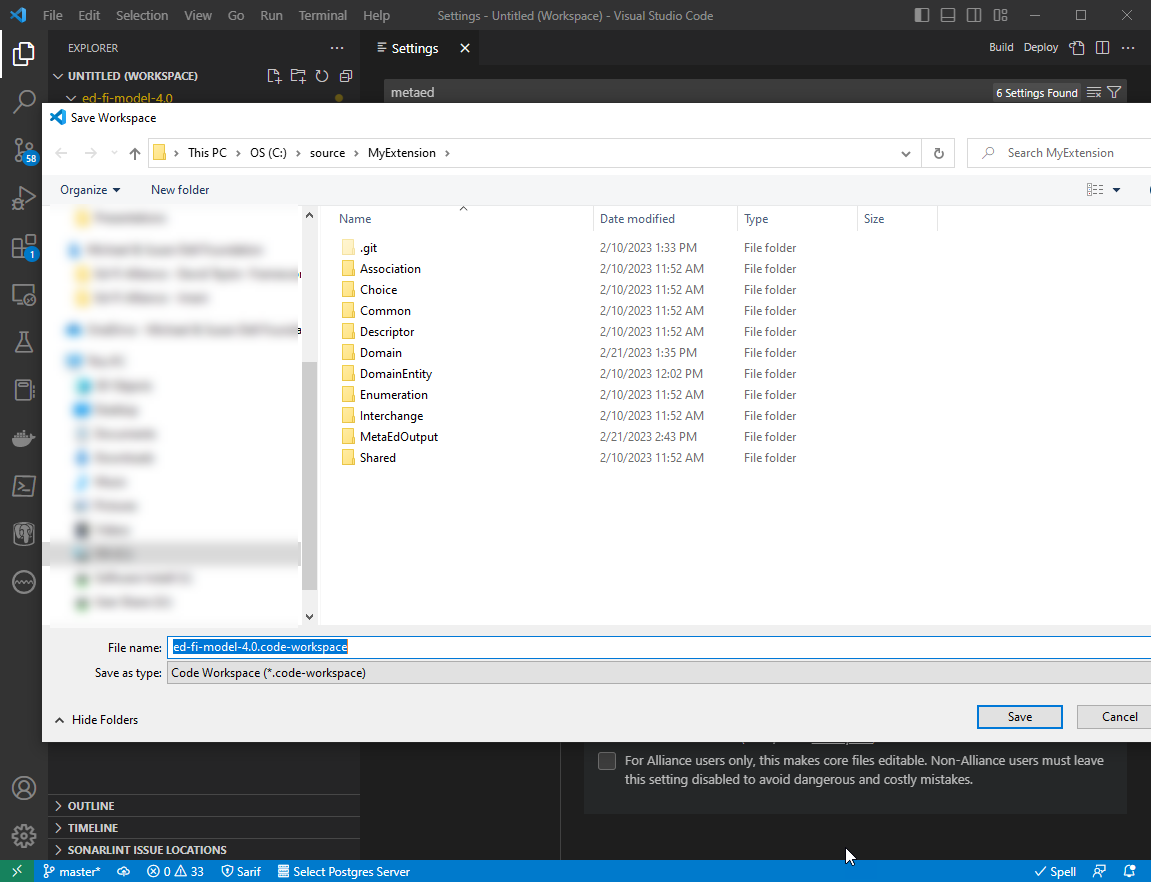
This creates a workspace file that contains any settings that you configured in Workspace Settings, like this:
{
	"folders": [
		{
			"path": "../../Users/XYZ/.vscode/extensions/ed-fialliance.vscode-metaed-ide-0.0.1/node_modules/@edfi/ed-fi-model-4.0"
		},
		{
			"path": "."
		}
	],
	"settings": {
		"metaed.targetOdsApiVersion": "6.1.0",
		"metaed.acceptedLicense": true,
		"metaed.allianceMode": false,
		"metaed.odsApiDeploymentDirectory": "c:\\source\\ed-fi"
	}
}
The next time you open the extension folder, you will be prompted to also open the Ed-Fi model folder (which is required in order to run the Build and Deploy actions).

Ignore in source control
Note that the workspace file has a path that includes the username. This path will not work on anyone else's computer. Therefore this file should not be kept in source control. If you are using git, then add *.code-workspace to your .gitignore file.
→ Ready to build the ODS/API? Next up: MetaEd IDE - Using the Generated Artifacts
IDE User Guide Contents
Read more about how to use the MetaEd IDE: