Quick Start for Data Import in Docker
Note: this TechDocs page applies to Data Import 1.3.2.
Using Docker Deployment for Data Import
Docker Containers within Docker Desktop
Docker Containers have the added benefit of running anywhere (e.g., VMs, on premises, in the cloud), which is a huge advantage for both development and deployment. It has been adopted by leading cloud providers, including, Google Cloud, Amazon Web Services (AWS), and Microsoft Azure. For simplicity, the steps below describe how to install on Data Import and the Ed-Fi Tech Suite on Docker Desktop.
Step 1. Downloading Docker Compose File
We've created a package which provides for a "quickstart" into Docker Desktop to provide Data Import with a full pre-configured Ed-Fi Tech Suite. This package contains a Docker compose file, a file for environment variables to start Docker ".env" file, SSL folder with pre-built certificate and a script to generate SSL certificates for secure configuration.
This package can be downloaded using the side bar on the right.
Step 2. Setup the environment variables:
.env file please update the following environment variables with appropriate values:
POSTGRES_USER=postgres
POSTGRES_PASSWORD=P@ssw0rd
PGBOUNCER_LISTEN_PORT=6432
TIME_ZONE=US/Central
DATABASE_ENGINE=PostgreSql
LOGS_FOLDER=C:/temp/logs/
ENCRYPTION_KEY=<base64-encoded 256-bit key Ex:0OMFT0TjnBXNN9paZBTicAmKjw678QIyzWUKHtyr4G0=
User can use provided example value just for a quick testing purpose. Else can generate encryption key as follows:
Generate encryption key on Linux:
openssl rand -base64 32
Generate encryption key on Windows PowerShell:
 $aes = [System.Security.Cryptography.Aes]::Create()
 $aes.KeySize = 256
 $aes.GenerateKey()
 [System.Convert]::ToBase64String($aes.Key)
Step 3. Generate SSL certificate
The quick start package already contains SSL folder with required certificate and key files. Else can generate the new certificate and key files as follows:
Using Git Bash
- Start a Git Bash Session
- Run the following commands:
|
Please refer Docker Deployment#Step4.ProvideSSLcertificate for more details.
Step 4. Setup the docker containers
- Run PowerShell session on Administrator mode.
- Change directory to where downloaded compose file resides.
- Make sure .env file and SSL folder are in the same folder as Compose file.
- Run following docker command for setting up the containers:
|
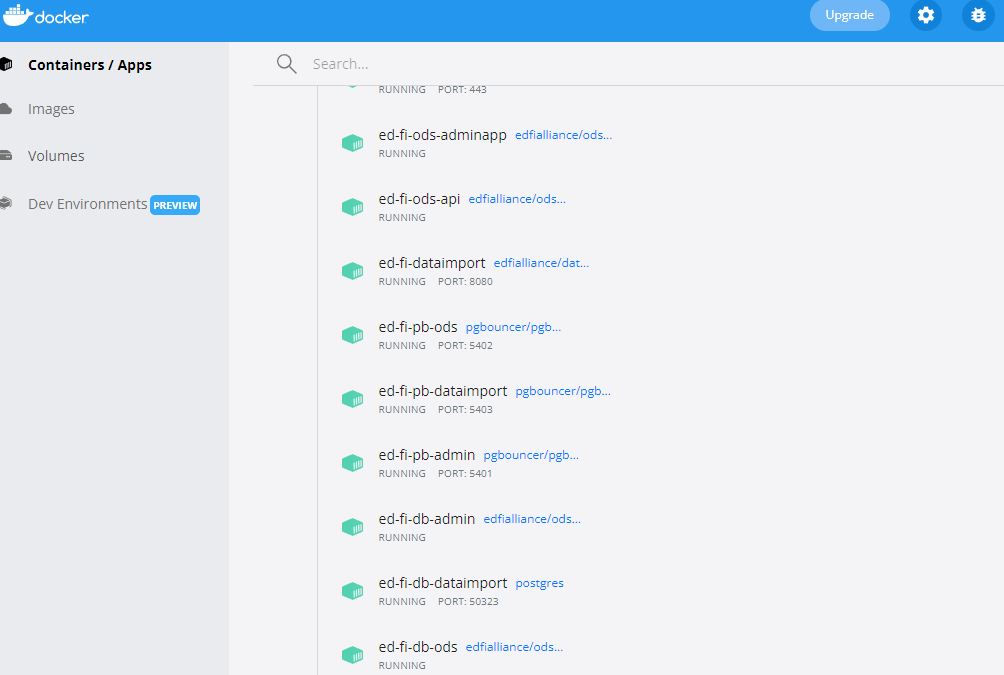
Step 5. Checking the deployed web applications
On Docker Desktop, can see all the deployed application containers
Step 6. Using Data Import on Docker
Data Import and other important Ed-Fi Tech Suite components are available on your workstation below:
- Data Import: http://localhost:8080/
- Admin App: https://localhost/adminapp
- ODS / API: https://localhost/api
Step 7. Execute the Data Import Server Transform Load Service
To run the Transform-Load service within Data Import running in Docker, use a command such as below:
docker exec -w /app/DataImport.Server.TransformLoad/ -ti <container-name> ./DataImport.Server.TransformLoad
The following links contain relevant source code and published images: