First-Time Configuration
This section describes the post-installation Data Import configuration process.
Required Information
You will need the following information to complete this installation.
- The API base URL and version of your Ed-Fi ODS / API
- An API key and secret with create permissions for entities into which the system will be importing
Configuration Instructions
The high-level steps for configuration are:
Detail follows.
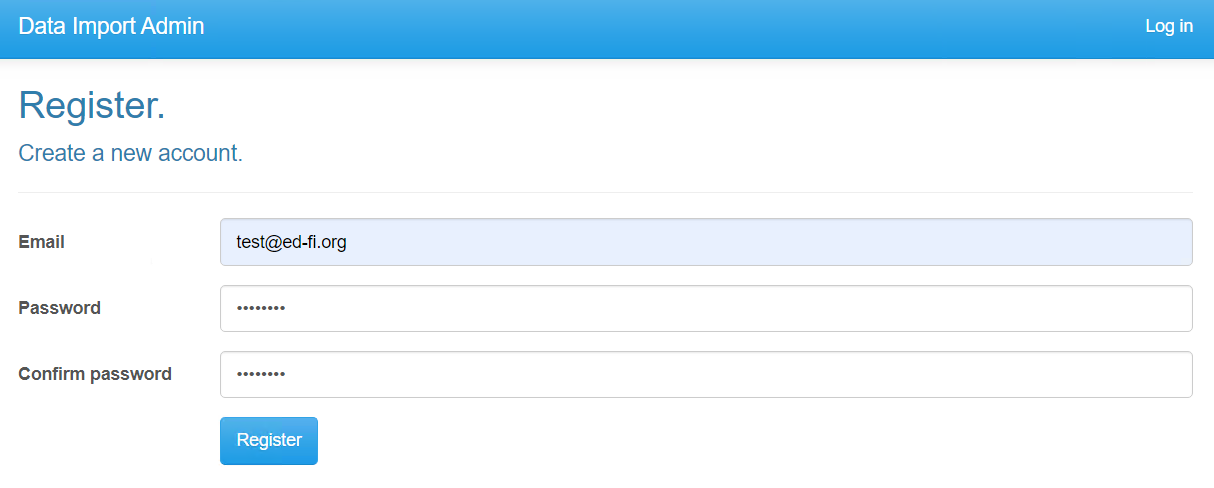
Step 1. Create Data Import Administrative User
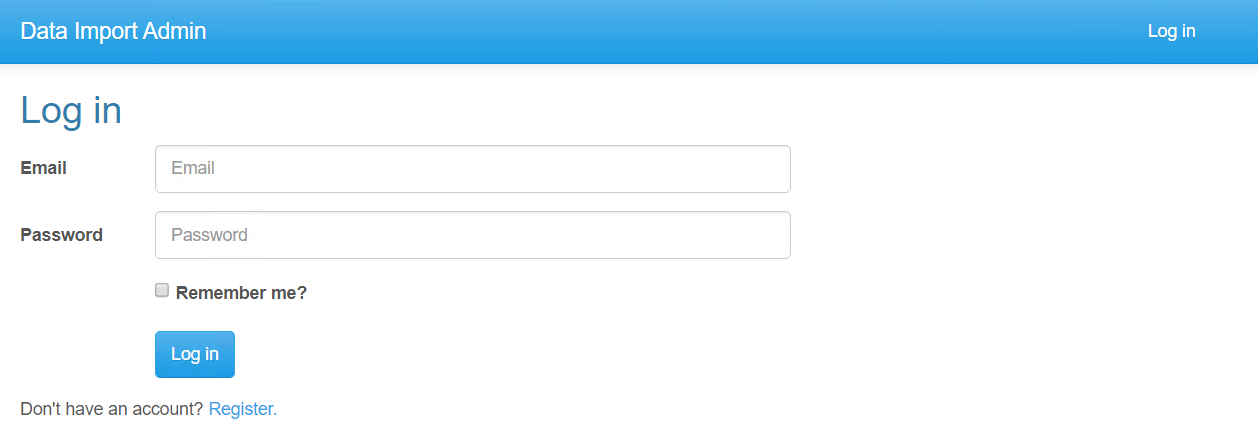
If the option "Don't have an account? Register" is seen, click on the link to create an application user.
Step 2. Enter API Server Information
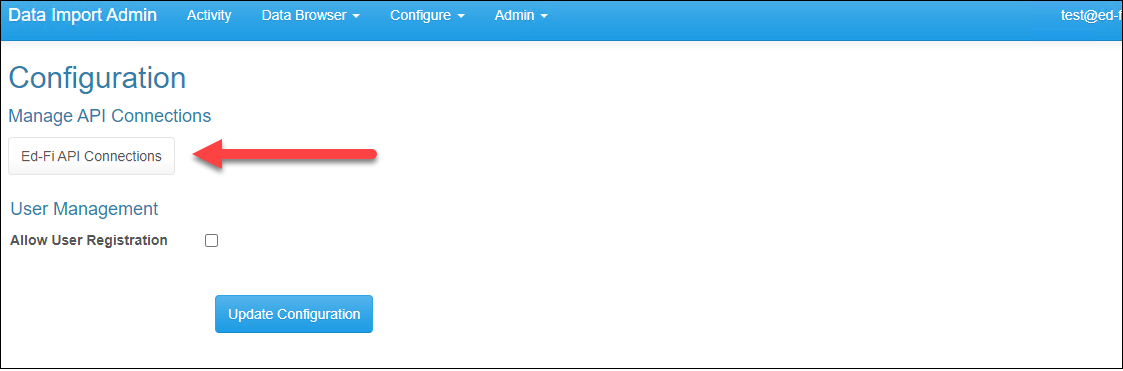
Once logged in, Data Import will open the Admin > Configuration screen. The API Server block contains essential information required for Data Import to function.
Configure the following fields:
- API Server Url. The URL of the Ed-Fi API targeted for import.
- API Server Key. An Ed-Fi ODS / API key with permissions to create data in targeted entities.
- API Server Secret. An Ed-Fi ODS / API secret paired with key above.
Claim set requirements
With the current release of Data Import, the claim set (key & secret) provided needs to enable authorized access read the Ed-Fi ODS / API /schools resource. If you use an "out of box" claimset, then you will need to use either the "Ed-Fi Sandbox" or "SIS Vendor" claim sets. The "Assessment Vendor" claim set does not enabled with this access. Alternatively, you can use the Admin App's /wiki/spaces/ADMIN/pages/25238340 to create a custom claim set.
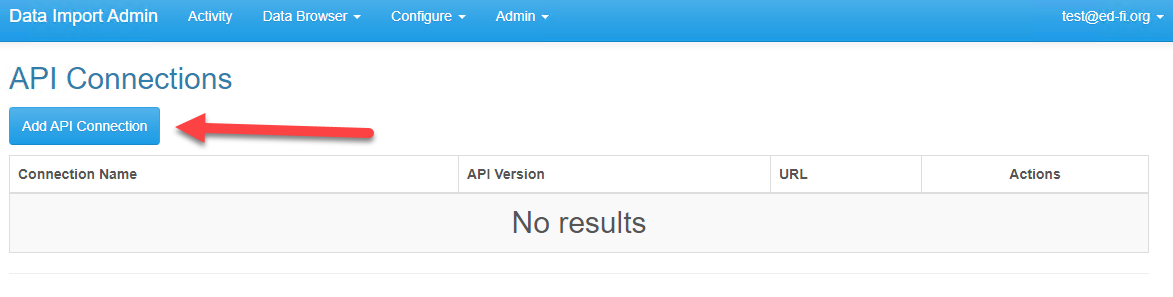
1.) Click on the Ed-Fi API Connections button to open the API Connections panel. Data Import works with multiple API connections and needs at least one to function.
2.) Click on the "Add API Connection" to add the first Ed-Fi ODS / API connection.
3.) Add a Name for the API Connection, the API URL, Key and Secret. Click on the "Test Connection" button. If successful as indicated by the confirmation message, click "Save Changes" to add the connection.
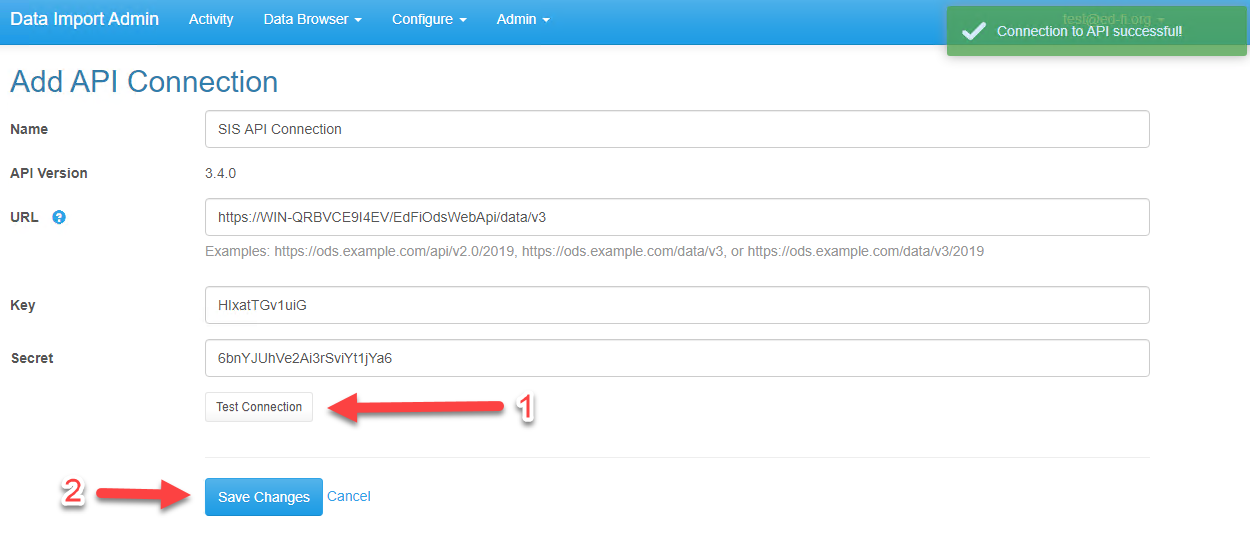
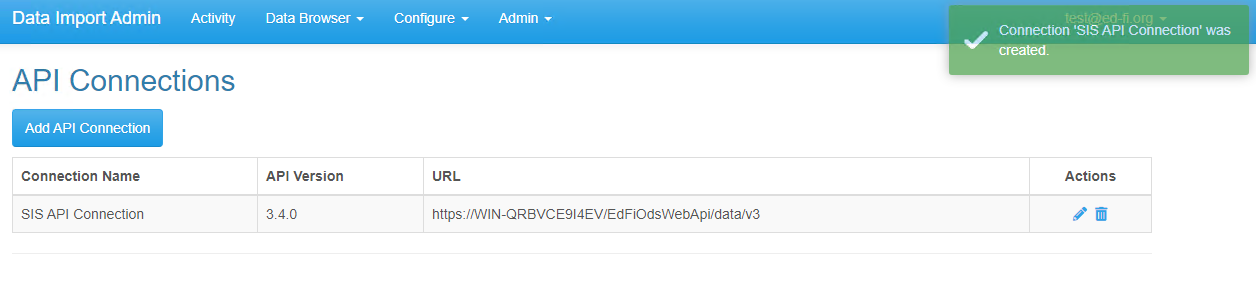
4.) After saving the connection, you will be returned to the API Connections screen.
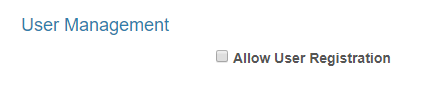
Step 3. (Optional) User Management
If you wish to register additional users within this instance of Data Import, enable "Allow User Registration" below and run through Step 1 to create additional users. Ensure this option is disabled once all users are created. If not adding new users beyond the initial administrative user in Step 1, it is recommended to not allow user registration (i.e., leave the checkbox unchecked) unless and until needed.
Step 4. Update Configuration
With all prior steps completed, click on the "Update Configuration" button. Once configuration is verified, "Configuration was modified" will appear in the top-right of the screen. From here, it is recommended to view Quick Start for additional information on how to use Data Import.

Step 5. (Optional) Use Quick Start for an Introduction to Data Import
For a walk-through of your first import with Data Import, please follow the Quick Start instructions on the next page.
Contents
Read more about getting started with the Data Import tool: