The Ed-Fi “Classic Dashboards” are no longer supported through the Ed-Fi Alliance. You can still receive support and maintenance through the Ed-Fi vendor community. Please look at any of the vendors’ dashboard solutions on the Registry of Ed-Fi Badges or the Ed-Fi Starter Kits if you are looking for a visualization solution to use with the Ed-Fi ODS. This documentation will remain available to assist existing Classic Dashboard implementers.
UI Developers' Guide - Installation
This section outlines the steps necessary to download, configure, build, and run the Ed-Fi Dashboard UI on a development machine.
The Ed-Fi Dashboards configuration described in this document has been tested with the following software configuration:
- Windows 8.1 Professional (64-bit) and Enterprise (64-bit); Windows 10 Professional (64-bit) and Enterprise (64-bit).
- Windows Server 2012 and Windows Server 2008 R2 (Windows Server 2008 releases before R2 are not supported).
- Internet Information Services (IIS) 8.0 and IIS 10.0.
- Microsoft SQL Server 2016 (Standard Edition, Developer Edition, or Enterprise Edition. Note that Express Edition is not supported). Configure SQL Server with the following features:
- Database Engine Services (replication/text search not required).
- Management Tools (complete).
- Use the default instance (MSSQLSERVER).
- Choose Mixed Mode security (the application uses a SQL login).
- Specify a password for the sa account.
- In the “Specify SQL Server administrator” click on Add Current User.
- Visual Studio 2013 or 2015 (Professional Edition or higher).
- .NET Framework 4.5.2.
Preparing a development environment to run the dashboards can be summarized as follows:
Step 1. Download and Extract the Dashboard Source Code
The Ed-Fi Dashboards source code is contained in one repository that can be downloaded using git clone or as a ZIP archive from the Ed-Fi Alliance source code repository in GitHub at https://github.com/Ed-Fi-Alliance/Ed-Fi-Dashboard.
- The links to the latest stable and development code versions are located in the section Getting Started - Downloading the Code.
- Git Clone or extract the repository to the folder C:\Ed-Fi\ if the code is not already present.
It is recommended to clone/extract the repo to C:\Ed-Fi\ to avoid issues with the path and file name length. If you use a different path be sure to substitute your chosen path when following the setup instructions throughout this document.
- When the extraction and renaming is complete, there should be seven folders for the dashboard source code as shown below:

Step 2. Restore Sample Database
There are 2 know issues with the current installation instructions:
- As of June 15th, 2020 nuget.org disabled TLS 1.0 and 1.1 support, which causes nuget downloads for Dashboards to fail. See DASH-3360 - Getting issue details... STATUS for guidance on how to mitigate this problem.
- DASH-3355 - Getting issue details... STATUS describes an open issue users may encounter running the PowerShell "build.bat sample" command
- Glendale Sample Data Set. A robust sample set with around 47,000 students. This data set is used by the Alliance for dashboard development, unit testing, and integration testing.
To restore the sample data set:
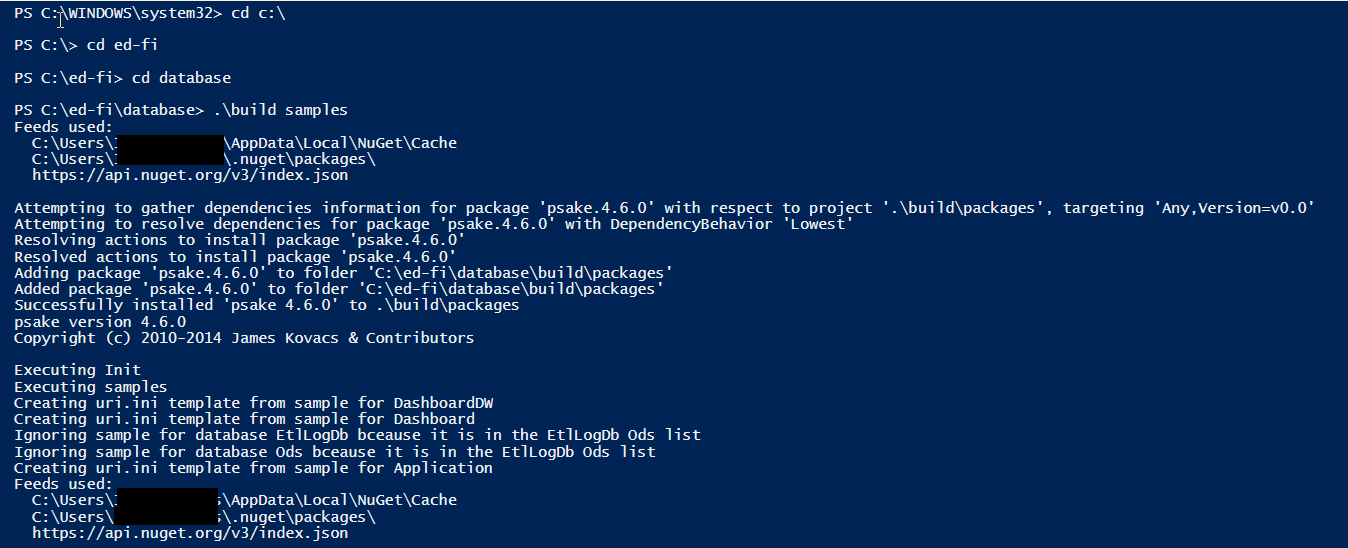
- Open a PowerShell window and navigate to C:\Ed-Fi\Database\ (presuming the installation path used in the Getting Started documentation was the recommended C:\Ed-Fi\).
- If the SQL Server is not set up as the default instance (MSSQLSERVER), then run the command
$env:db_server = ".\MYNAMEDINSTANCE"to setup the named SQL Server instance. - By default the script will restore the Glendale data set.
- To restore the Glendale data set, execute
$env:db_agency = "Glendale"from the PowerShell command window.
- To restore the Glendale data set, execute
- Run the command
.\build samplesto restore the following databases, fully pre-populated with sample data:- The ODS v3.2 database with the necessary views to support the ETL process.
- The Application, Dashboard, and DashboardDW databases, each fully populated with sample data.
Running the .\build samples script may take several minutes to execute.
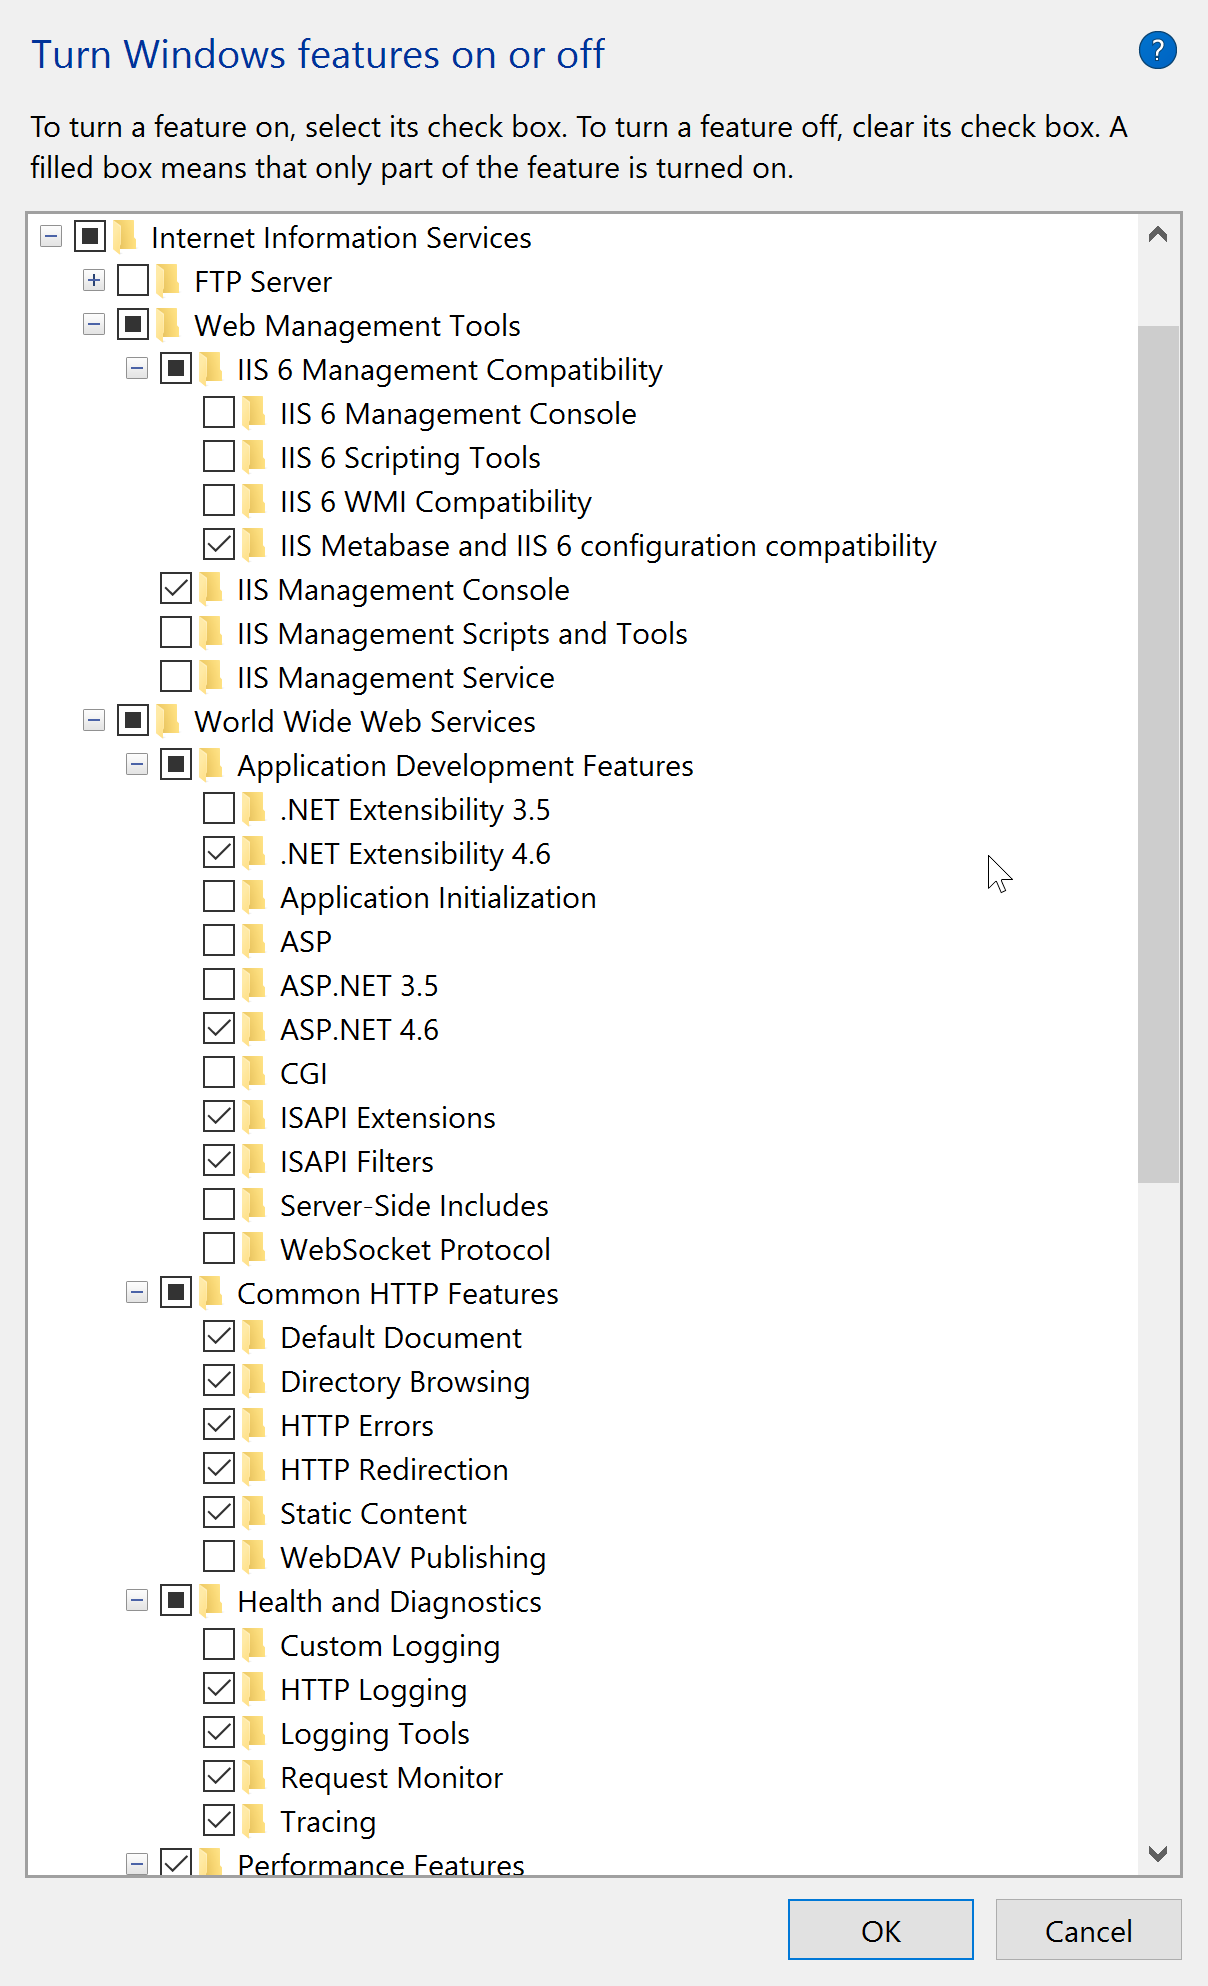
Step 3. Install and Configure Windows Components
Verify that the following Windows components are installed and configured:
- Install IIS 8.0 or IIS 10.0.
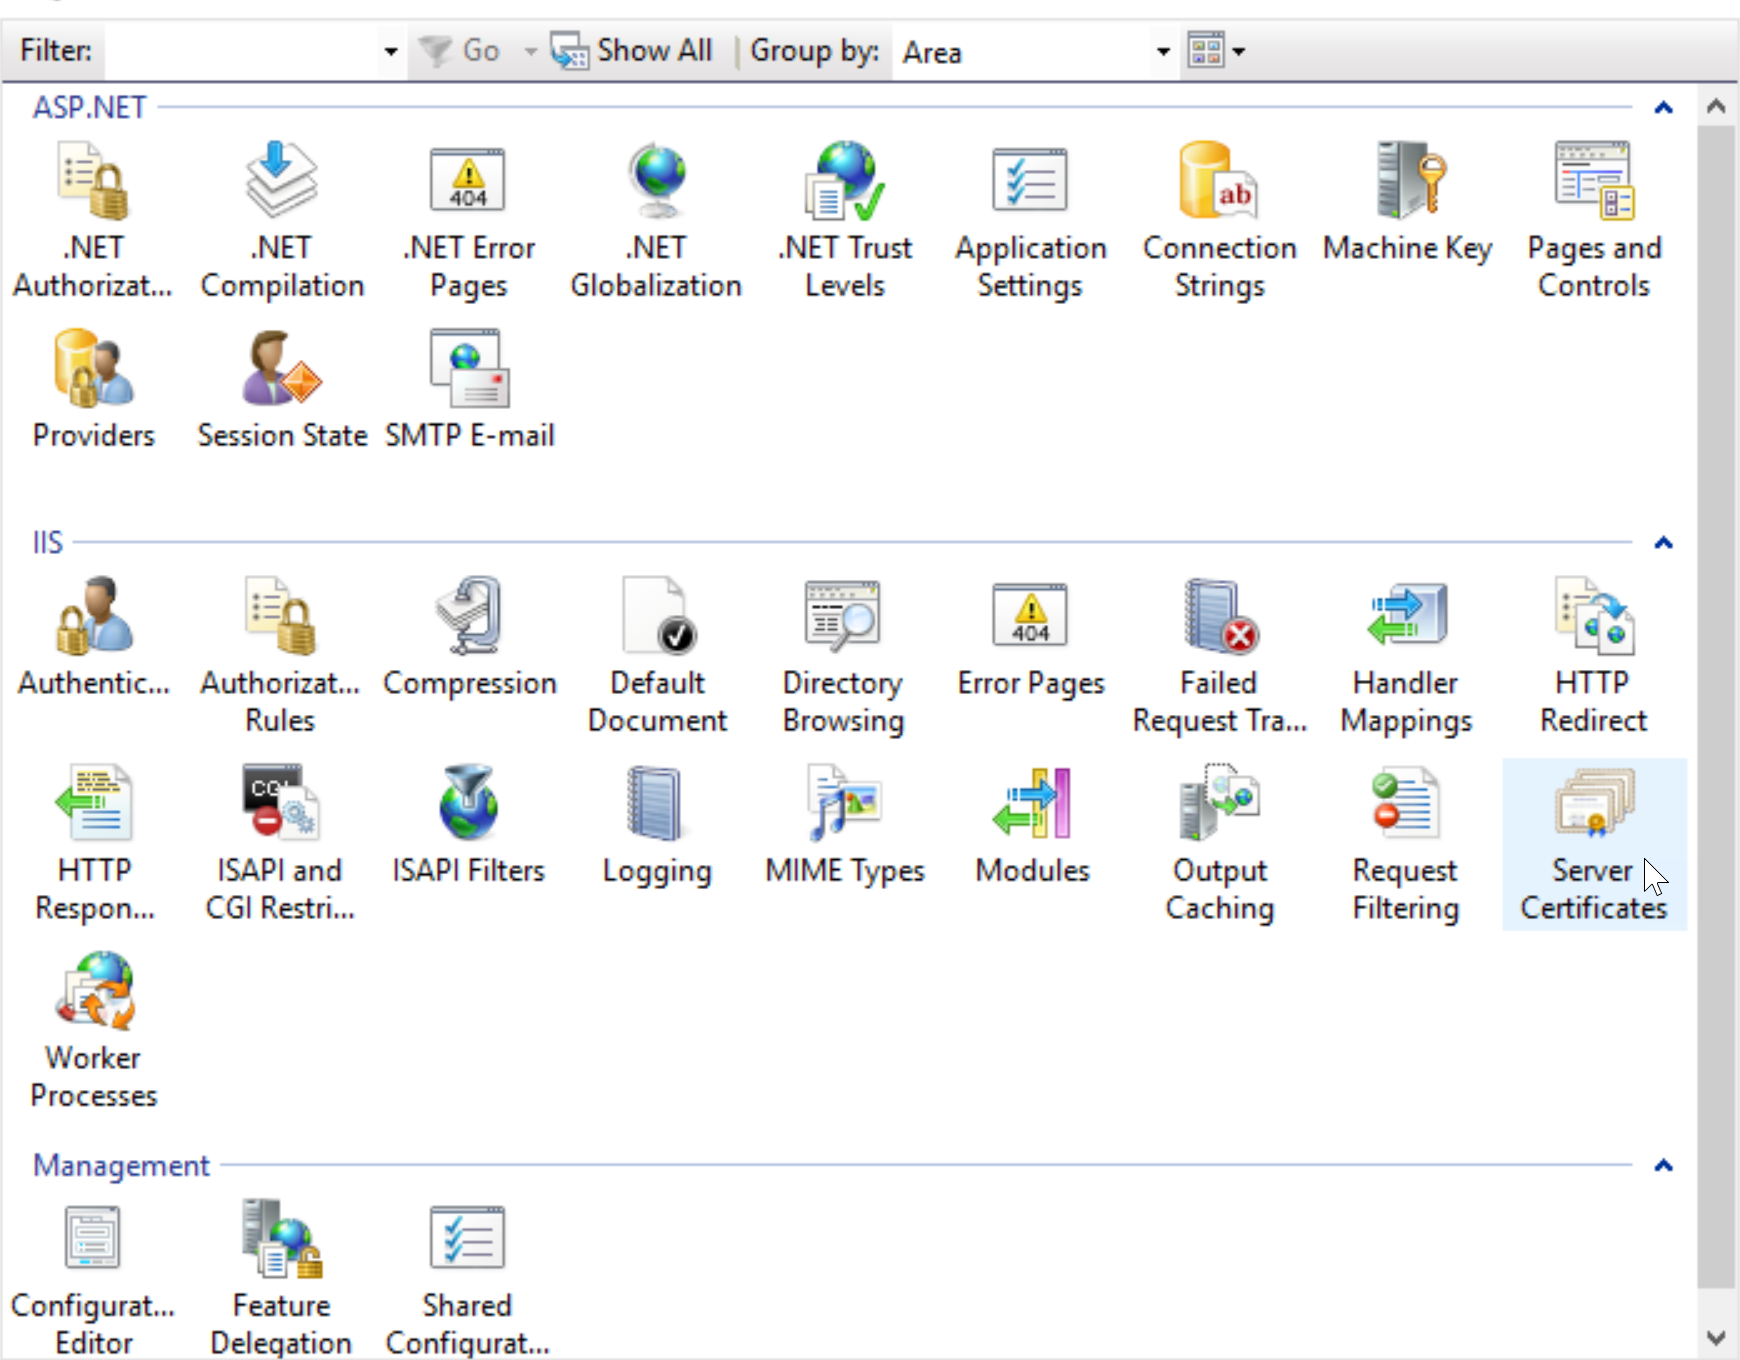
- Configure IIS using the Windows Features function. You can launch it by typing Turn Windows features on or off in the Windows Start menu search box, or by opening the Control Panel and navigating to Programs and Features > Turn Windows features on or off. Verify that IIS is configured with the options shown in the figure below:
If you install IIS after Visual Studio you will need to take the following steps to register ASP.NET with IIS:
- On Windows 10:
- Open the Developer Command Prompt for VS2015 as Administrator
- Run
dism /online /enable-feature /all /featurename:IIS-ASPNET45 - The operation completed successfully
- On versions of Windows prior to Windows 10: Open a command prompt, go to %system_root%\Microsoft.NET\Framework\v4.5.2., and run the following command:
aspnet_regiis -i.
- On Windows 10:
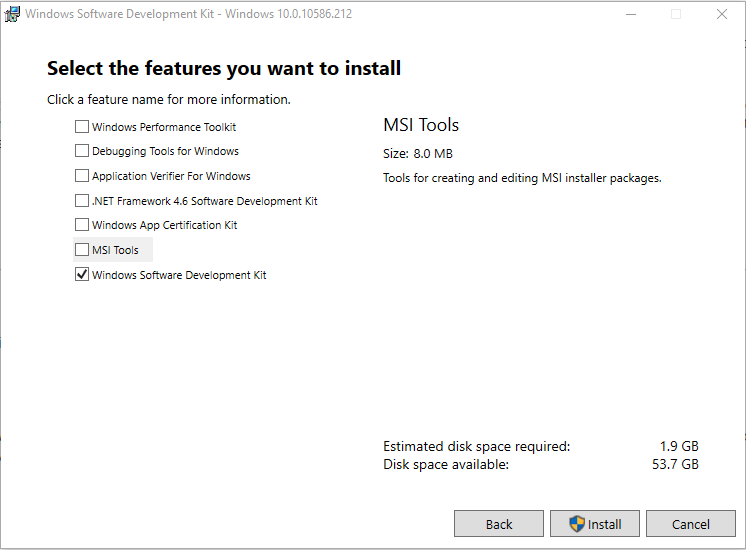
Install Windows 8 SDK (available at https://dev.windows.com/en-us/downloads/windows-8-sdk) or Windows 10 SDK (via Visual Studio 2015). Uncheck all options except Windows Development Tools (Windows 8) or Windows Software Development Kit (Windows 10):
Note that Windows 10 development targeting Windows 10, version 1809 (or later) requires Visual Studio 2017. This SDK will not be discovered by previous versions of Visual Studio.
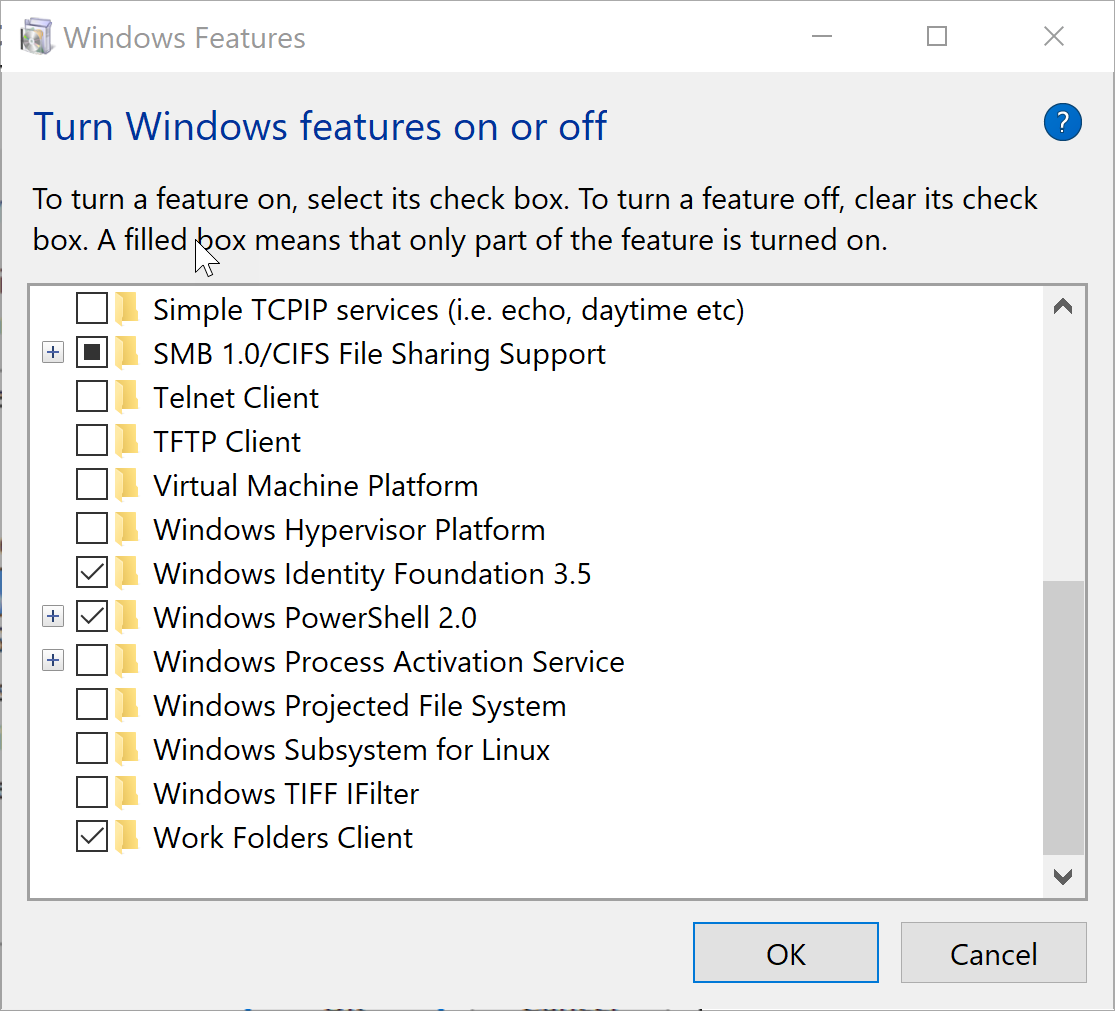
- Install Windows Identity Foundation.
Step 4. Configure Internet Information Services
Perform the following IIS configuration tasks to configure IIS for secure communications (HTTPS):
- Launch IIS Manager and click on “Server Certificates”:
- In the “Action” panel on the right side of the window, click Open Feature.
- Server Certificates Actions are listed. In the “Action” panel on the right side of the window, click Create Self-Signed Certificate.
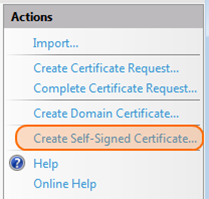
- When prompted, enter a friendly name (e.g. “MY-PC”) for the certificate and click OK.
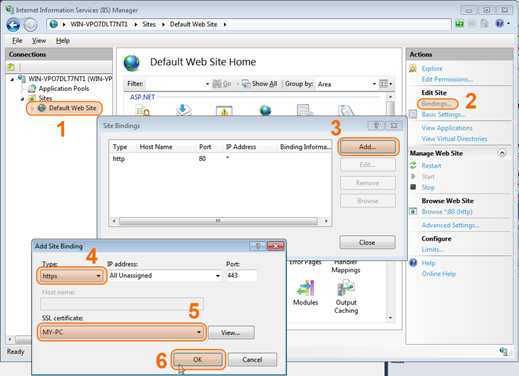
- Back in the IIS Manager window, edit the bindings for the default website to use SSL, as shown below:
Step 5. Configure Windows Identity Foundation (WIF)
- Make sure you have installed the Windows Identity Foundation as part of Step 3.
- Launch the Microsoft Management Console by selecting Start > Run… > mmc.exe.
- Select File > Add/Remove Snap-in…
- From the list, select the “Certificates” entry and click Add >. When prompted, select Computer Account, click Next, then select the Local computer option, click Finish, then click OK.
- Add the STSTestCert certificate to your local machine:
- From the Console Root, navigate to the Certificates (Local Computer) > Personal > Certificates folder.
- Right-click on the Certificates node and select All Tasks > Import… Click Next.
- Locate the “STSTestCert.pfx” file in the C:\Ed-Fi\Dashboard\Logistics\certificates folder.
- Change the File Types selection on the dialog to Personal Information Exchange in order to see *.pfx files.
- Select file, and click Next.
- When prompted for a password to access the certificate file, leave it empty as the certificate does not have a password, and click Next.
- Follow the instructions on screen and click Next until you can click Finish.
- Grant Read access to the IIS_IUSRS group by right clicking on the “STSTestCert” entry in the list and selecting the All Tasks > Manage private keys… menu item.
- If IIS_IUSRS group is not listed in "Groups or user names," click Add..., enter "iis_iusrs", click OK.
- The following step is only appropriate for a development workstation, and for test purposes only.
- Repeat the steps above to also import the STSTestCert into the Certificates (Local Computer) > Trusted Root Certificate Authorities > Certificates folder. This step allows the Dashboards website to trust the certificate used to sign the security tokens issued by the STS web application.
While accurately following all steps is important, take extra care with Step 5, as it is critical to ensuring that authentication works. For more information, we recommend you consult https://stackoverflow.com/questions/12106011/system-security-cryptography-cryptographicexception-keyset-does-not-exist.
Step 6. Configure Visual Studio NuGet Settings and Sources
The Ed-Fi Dashboard source code references customized libraries distributed as NuGet packages via a Myget.org feed. You must make some changes to your Visual Studio NuGet settings prior to building the solution. This will enable the NuGet package to restore “missing” dependencies when building the software.
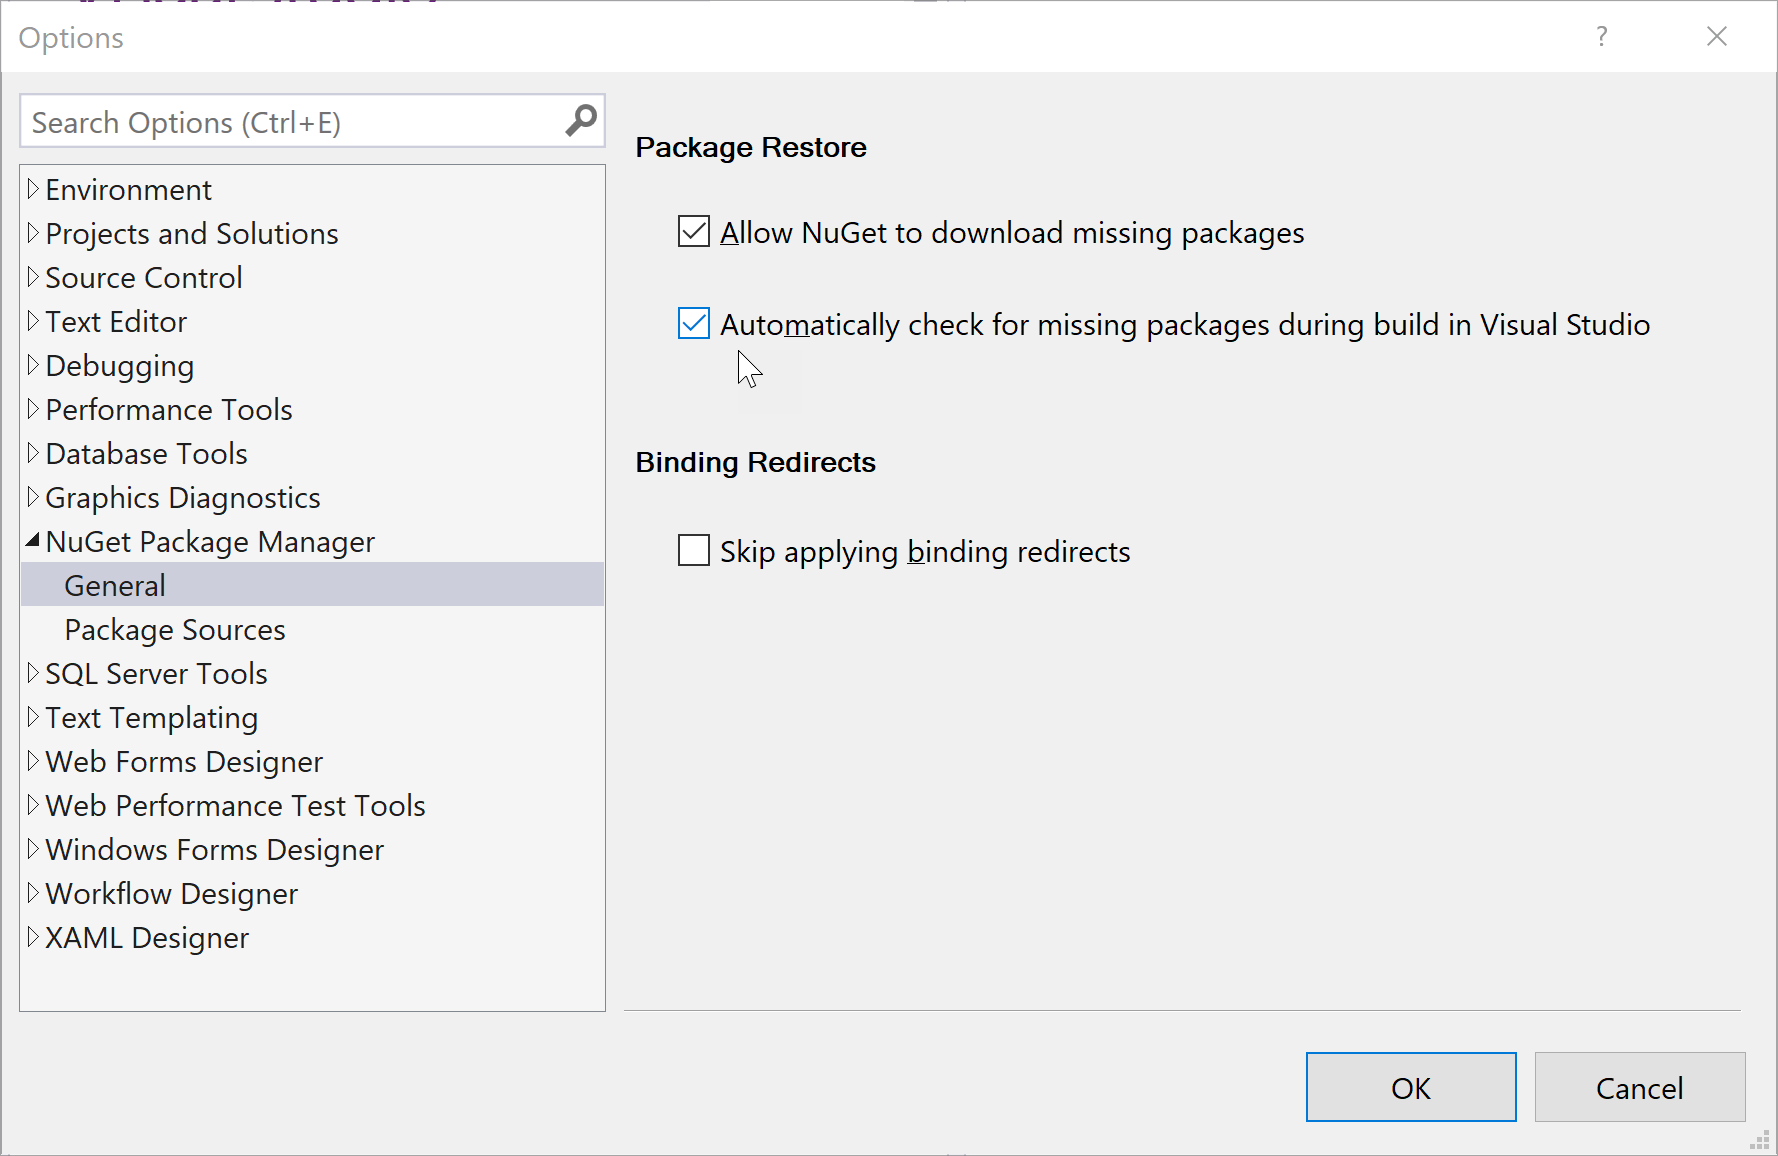
- The setting to “Allow NuGet to download missing packages during build” is disabled by default and must be enabled. In Visual Studio, select Tools > Nuget Package Manager> Package Manager Settings > General, and make sure the checkbox is selected, as shown below:
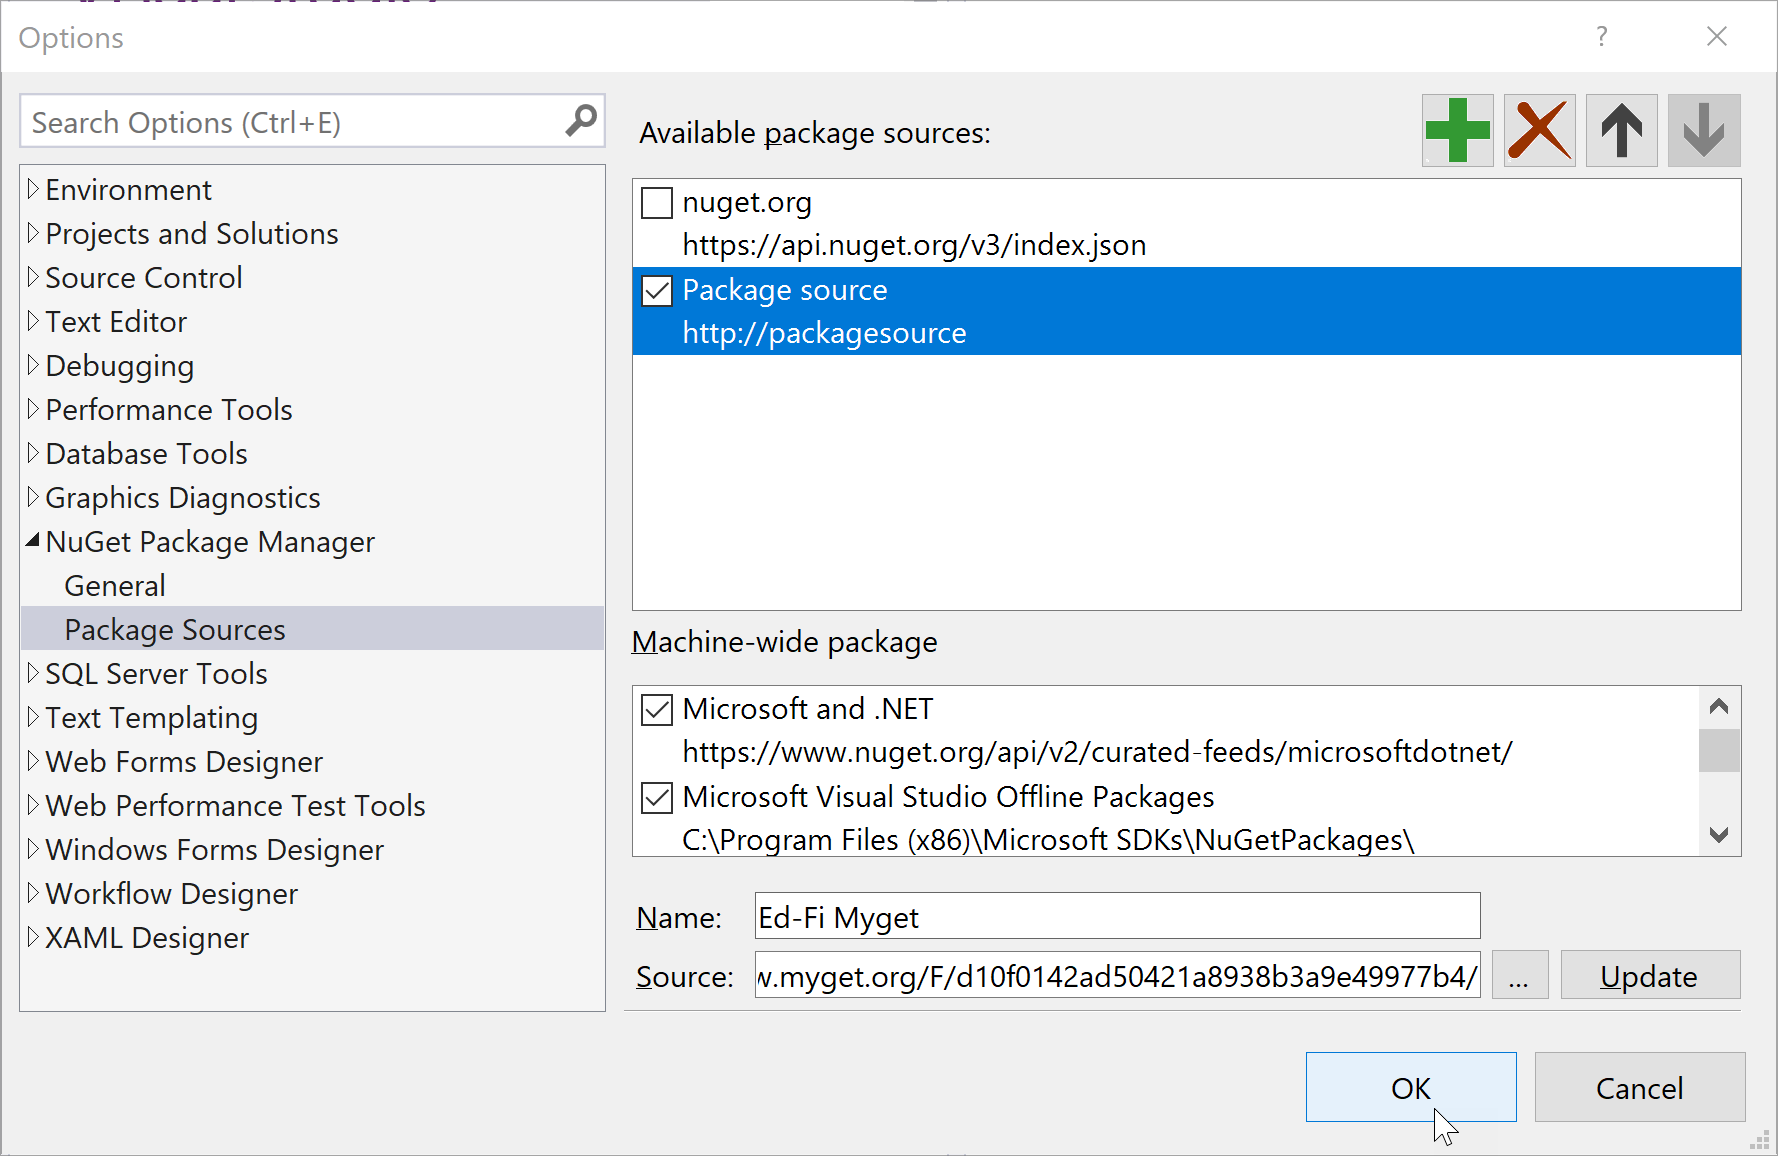
- Select the “Package Sources” node in the tree of the Options dialog, or from within Visual Studio, select Tools > Nuget Package Manager > Package Manager Settings > Package Sources, and uncheck the default NuGet official package source and add a new package source to the Ed-Fi Myget URL (which includes the default nuget.org source, http://www.myget.org/F/d10f0142ad50421a8938b3a9e49977b4/).
Step 7. Build and Launch the Dashboards Web Application
- Launch Visual Studio with UAC off or as Administrator.
- Open the C:\Ed-Fi\Dashboard\Application\EdFi.sln file in Visual Studio.
- The first time the solution is opened, you may be prompted to create the virtual directories for the application and for the Security Token Service website. If so, click Yes on both dialogs to automatically create the virtual directories.

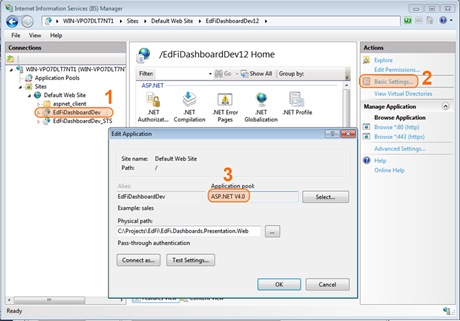
- After the EdFiDashboardDev virtual folder has been created in IIS, set the website’s application pool to load user profiles so that the WIF Security Token Service token can be decrypted properly.
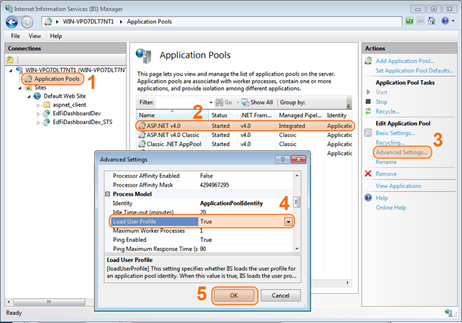
- Set the application pool used for both web applications to ASP.NET V4.0 (or higher):
- Ensure the Load User Profile value for the application pool is set to true (or the web application won’t be able to access the certificate needed to validate the security token received from the STS):
- Set the application pool used for both web applications to ASP.NET V4.0 (or higher):
- Back in Visual Studio, click on Build > Rebuild Solution.
- Next right click on the EdFi.Dashboards.Presentation.Web project in Solution Explorer, and select the Set as StartUp Project menu item.
- Launch the debugger (F5 on most Visual Studio keyboard configurations).
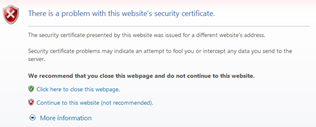
- You will probably see a certificate error similar to the following, depending on your browser. Click the option to Continue.
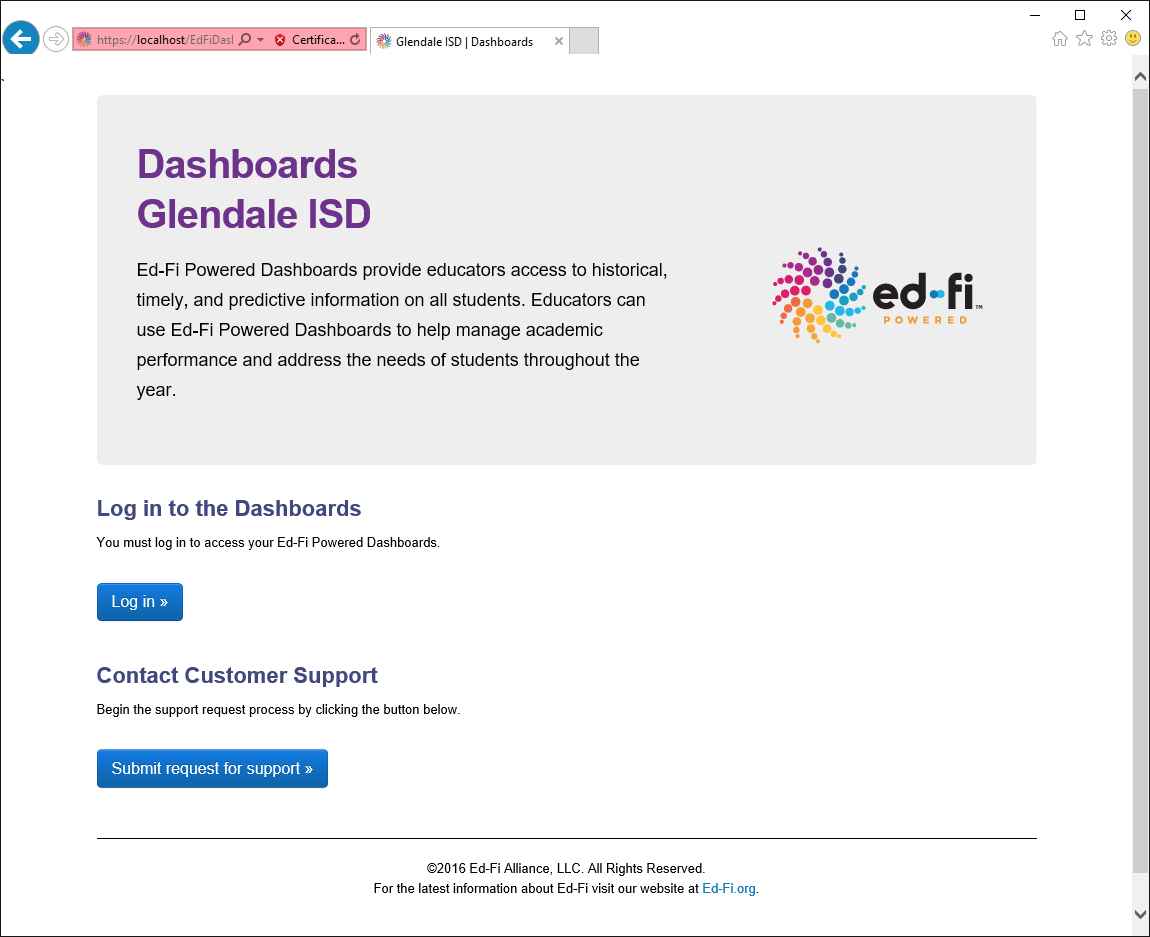
- You should now see the website’s home page. Click on the Glendale ISD link and then on the resulting web page, click Log In to the Dashboards.
At this point, installation is complete and the Dashboards are ready for you to explore.
Step 8. Running the Dashboards
Once you have the Dashboards set up on a local development machine, you can log in and explore the system as different user types using the credentials that ship with the source code:
| User Name* | Role | Organization |
|---|---|---|
| gabbyann.martins | Superintendent | Glendale ISD |
| jeri.russell | Principal | Hollywood High School |
| anissa.canty | Principal | Mt. Gleason Elementary School |
| tiffany.paul | Teacher | Hollywood High School |
| serena.canty | Teacher | King (Martin Luther) Elementary School |
| daria.cloutier | System Administrator | Glendale |
*The password can be anything for all usernames.
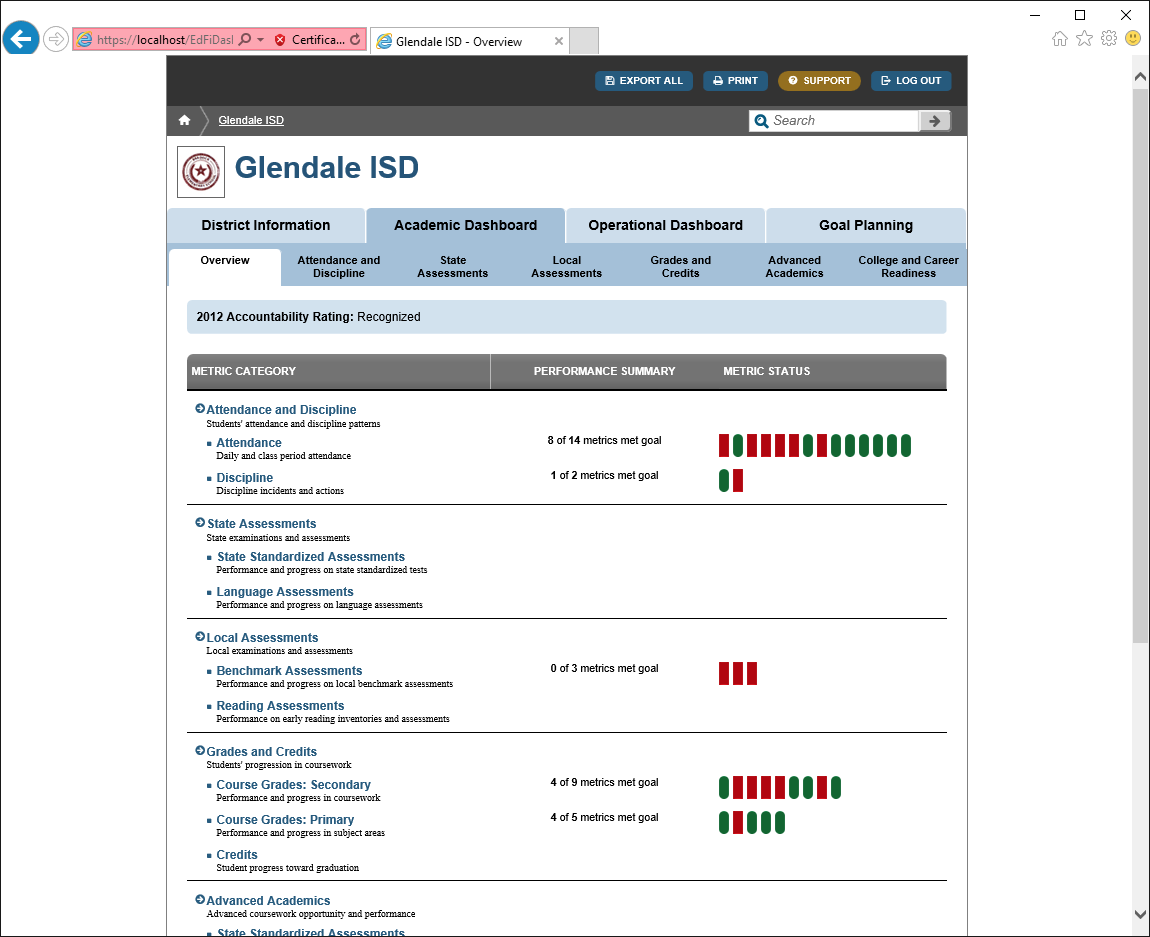
If everything has been configured correctly, you should now see the dashboard home page, for example, the Superintendent user will see the Glendale ISD Overview page:
You can learn more about Dashboard functionality by reviewing the Quick Start User Guide.