Admin App for Suite 3 v2.0.1
Before You Install
This section provides general information you should review before installing the Ed-Fi ODS / API Admin App for Suite 3 v2.0.1.
Compatibility & Supported ODS / API Versions
This version ODS / API Admin App can be installed for use with the Ed-Fi ODS / API v3.4 and v5.0.0. See the Ed-Fi Technology Version Index for more details.
Prerequisites
The following are required to install the Admin App:
- The Admin App provides an interface to administer an Ed-Fi ODS / API. Understandably, you must have an instance of the Ed-Fi ODS / API v3.4 or v5.0.0 deployed and operational before you can use the Admin App. Tested configurations include on-premises installation via the Tech Suite Installer or manual installation via source code.
- The .NET Framework 4.8 Runtime and .NET Core 3.1 SDK is required on the destination server before installation of Admin App.
- A SQL Server 2012 or higher, or Postgres 11 or higher database server as also in use with your ODS / API v3.4 or v5.0.0 installation.
- A modern web browser such as Google Chrome, Mozilla Firefox, or Microsoft Edge. Internet Explorer 11 (a pre-installed browser on Windows Server) may load, but may not function when using Admin App.
Required Information
You will need the following information to complete this installation:
- The location of your Ed-Fi ODS / API.
- Administrator access and credentials for either on-premises or Azure environment with target Ed-Fi ODS / API.
Installation Instructions
This section provides step-by-step instructions for installation. The specific steps are different depending on the deployment model and version of your Ed-Fi ODS / API.
On-Premises Deployment
Each step is outlined in detail below for the PowerShell deployment. Ensure that you have permission to execute PowerShell scripts. For more information, see http://go.microsoft.com/fwlink/?LinkID=135170.
Step 1. Download and Open Installer Package
You can download the EdFi.Suite3.Installer.AdminApp.2.0.1 package from the link in the sidebar to the right, rename it to *.zip and extract it as you would any zip file. Alternatively, you can accomplish the same with PowerShell. Open PowerShell and change to a temporary directory, then download and open the EdFi.Suite3.Installer.AdminApp package. The following script downloads the package, opens it, changes to the unzipped directory, and opens Windows Explorer in that location:
cd c:\temp
$url = "https://www.myget.org/F/ed-fi/api/v2/package/EdFi.Suite3.Installer.AdminApp/2.0.1"
$pkg = "EdFi.Suite3.Installer.AdminApp.2.0.1"
Invoke-RestMethod $url -OutFile "$pkg.zip"
Expand-Archive "$pkg.zip"
cd $pkg
explorer .
Step 2. Configure Installation
Open the "install.ps1" file. You will need to edit this file with your configuration details. If a value is not present for any of the parameters, it will use its default value.
- Configure
$dbConnectionInfo. These values are used to construct the connection strings.Server. The name of the database server. For a local server, we can use "(local)" for SQL and "localhost" for PostgreSQL.Engine.Admin App supports SQL and PostgreSQL database engines. So setting up theEnginewill decide which database engine to be used. Valid values are "SQLServer" and "PostgreSQL".UseIntegratedSecurity.Will either be "$true" or "$false".- If you plan to use Windows authentication, this value will be "$true"
- If you plan to use SQL Server/ PostgreSQL server authentication, this value will be "$false" and the Username and
Passwordmust be provided.
Username. Optional. The username to connect to the database. IfUseIntegratedSecurityis set to $true, this entry is not neededPassword. Optional. The password to connect to the database. IfUseIntegratedSecurityis set to $true, this entry is not neededPort.Optional. Used to specify the database server port, presuming the server is configured to use the specific port.
- Configure
$adminAppFeatures. These values are used to set Optional overrides for features and settings in the web.config.ApiMode.Possible values:sharedinstance,districtspecificandyearspecific. Defaults tosharedinstanceSecurityMetadataCacheTimeoutMinutes. Optional. Defaults to 10 minute security metadata cache timeout.
- Configure
$p. This is the variable used to send all the information to the installation process.ToolsPath. Path for storing installation tools, e.g., nuget.exe. Defaults to "C:/temp/tools"OdsApiUrl. Base URL for the ODS / API. Mandatory.AdminDatabaseName. ,OdsDatabaseName,SecurityDatabaseName. Optional. Specify only if ODS / API was set with a custom database name.- For example, when configuring the
OdsDatabaseName, the value here will be the name of the ODS database, whereas theAdminDatabaseNameandSecurityDatabaseNamewill be the name of the Admin and Security databases, respectively.
- For example, when configuring the
WebApplicationName,WebApplicationPath. Optional. Defaults to "AdminApp" and "C:\inetpub\Ed-Fi\AdminApp" respectively.WebSitePort. Optional. Defaults to 443.WebsiteName. Optional. Defaults to "Ed-Fi".PackageVersion. Optional. If not set, will retrieve the latest full release package.
Below is an example of the configuration of the "install.ps1" file for SQL Server with sharedinstance mode:
Below is an example of the configuration of the "install.ps1" file for PostgreSQL with districtspecific mode:
Step 3. Run the Installation via PowerShell
Run "install.ps1" script.
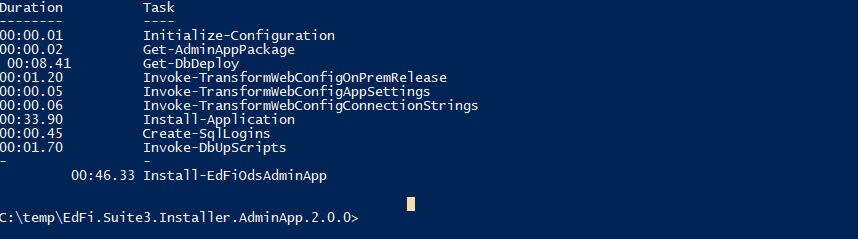
The PowerShell output will look something like the following:
Step 4. Create SQL Server Login (if "useIntegratedSecurity" set to "true")
This step only needs to be completed if you set useIntegratedSecurity to true on the "install.ps1" script in Step 2, above. If you did not, we can skip ahead to Step 5.
Now that the installation has finished, follow these steps to create a new SQL Server login for the AdminApp Application Pool:
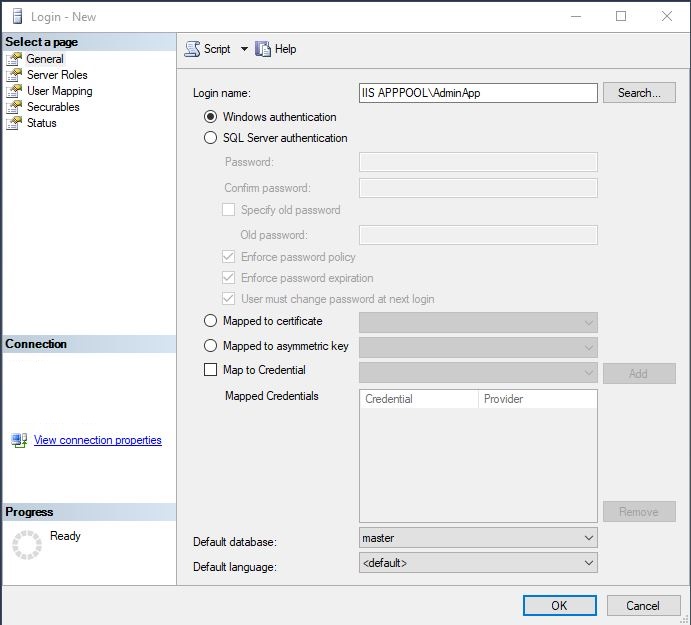
- Open SQL Server Management Studio and at the server-level, expand the "Security" folder. Right-click, select Logins > New Login...
- For the Login Name, enter "IIS APPPOOL\AdminApp".
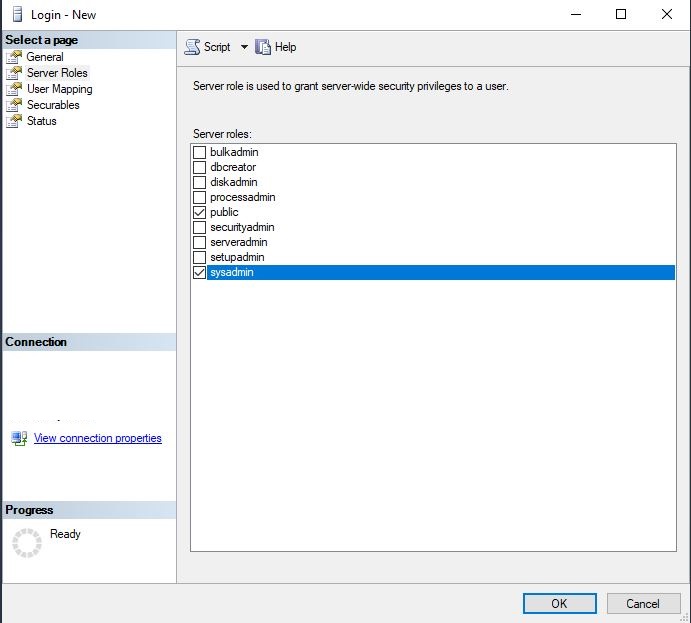
- On the left side of the pop-up window, select the Server Roles tab and ensure the "sysadmin" checkbox is checked.
- Everything else can be left at the default setting.
- Once you're done, click OK.
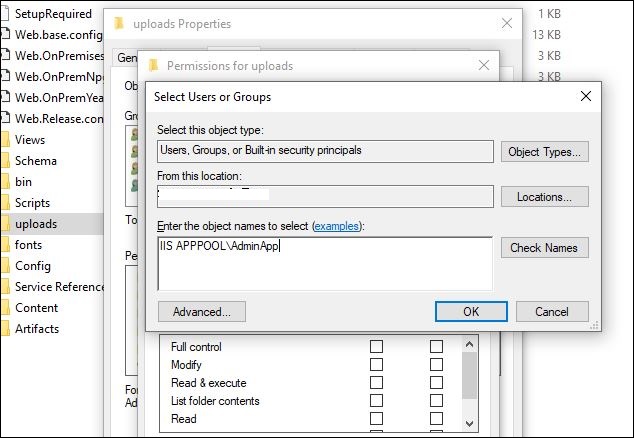
Step 5. Check Folder Permissions
Folders to verify:
- Admin App application "uploads" folder (default folder path: C:\inetpub\Ed-Fi\AdminApp\uploads).
- Admin App log folder (default folder path: C:\ProgramData\Ed-Fi-ODS-AdminApp).
For checking permissions:
- Right-click the folder, choose Properties, view the Security tab.
- Verify the "Group or user names" section has AdminApp with Full control.
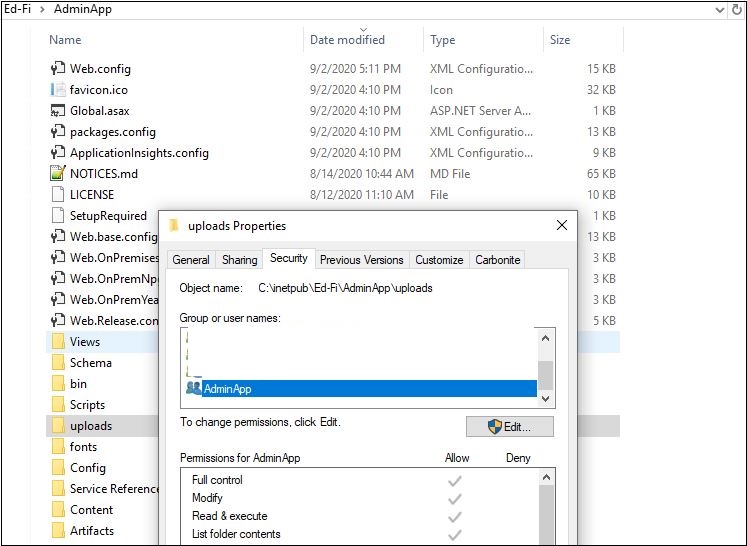
If the AdminApp not available on the list, add with Full control.
Step 6. Create Initial Administrative User
Upon first launch of the Admin App, you will have to create the initial administrative user for the application. This consists of creating a username and password for the initial user. Additional users can be added at a later time. Please see Securing the Admin App (v2.x) for more information.
Step 7. Restart the ODS / API
To finish the Admin App on-premises setup, the ODS / API should be restarted.
Steps for restarting the ODS / API:
- Open IIS Manager (inetmgr).
- In the Connections pane on the left, expand Sites and locate the Ed-Fi website.
- Right-click the website and select Manage Website > Restart.
- Close IIS Manager.
Step 8. Using the Admin App
The Admin App is now configured for use with your Ed-Fi ODS / API instance. Please visit the following articles to help with next actions in using Admin App:
Admin App also has a /wiki/spaces/ADMIN/pages/25231476 for an in-depth look at each of the features contained within.